There is no direct way to install the Google Play Store on Chrome OS Flex either officially or any other way. However, there is a different approach to getting the Google Play Store working on it. Since the normal Chrome OS version supports Android and the Google Play Store, we can install that instead.
Things To Know Before Installing Google Play Store on Chrome OS Flex
You need to remember, that this procedure will wipe the entire operating system. So if you have any data on Chrome OS Flex, make sure to back it up. Also, we are not only installing the Google Play store but also the entire Chrome OS on our system. In terms of hardware support, Chrome OS is designed to run on specific devices that are certified by Google i.e. Chromebooks.
Chrome OS Flex, on the other hand, is designed to run on a wider range of hardware, including older computers that may not meet the hardware requirements for Chrome OS. Accordingly, this procedure is not meant for all the systems and has some minimum requirements.
System Requirements
- 64 Bit Computer System with 16GB or more space
- Secure Boot Disabled from BIOS
- Hyper-V or Virtualization is enabled from BIOS
- 16 GB USB or above
- UEFI Boot
- Intel CPU from Skylake or above (6th Gen or above)
- Celeron processors are supported as of Goldmont or later.
- AMD Ryzen
- ARM CPUs are not supported
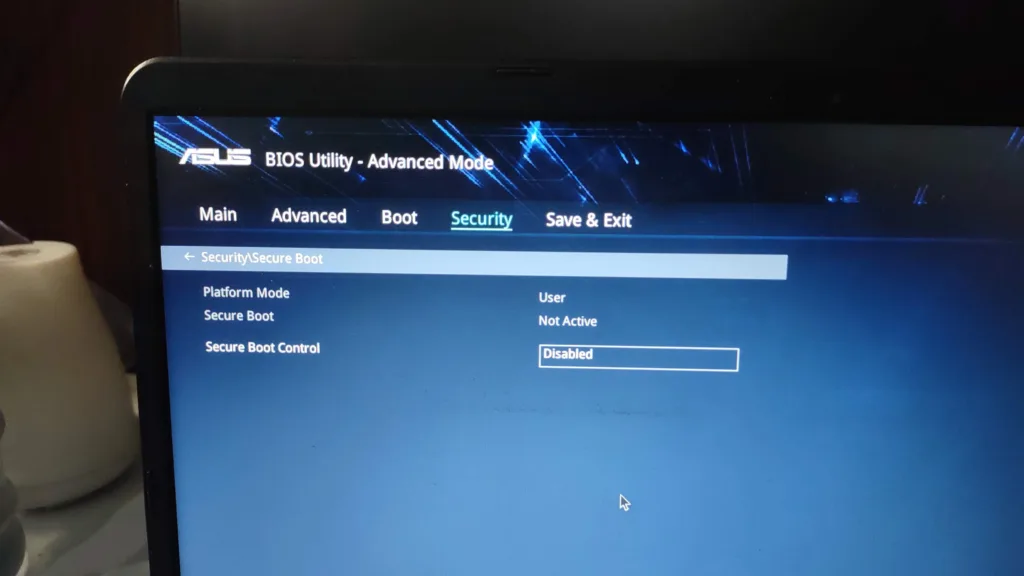
Disable Secure Boot
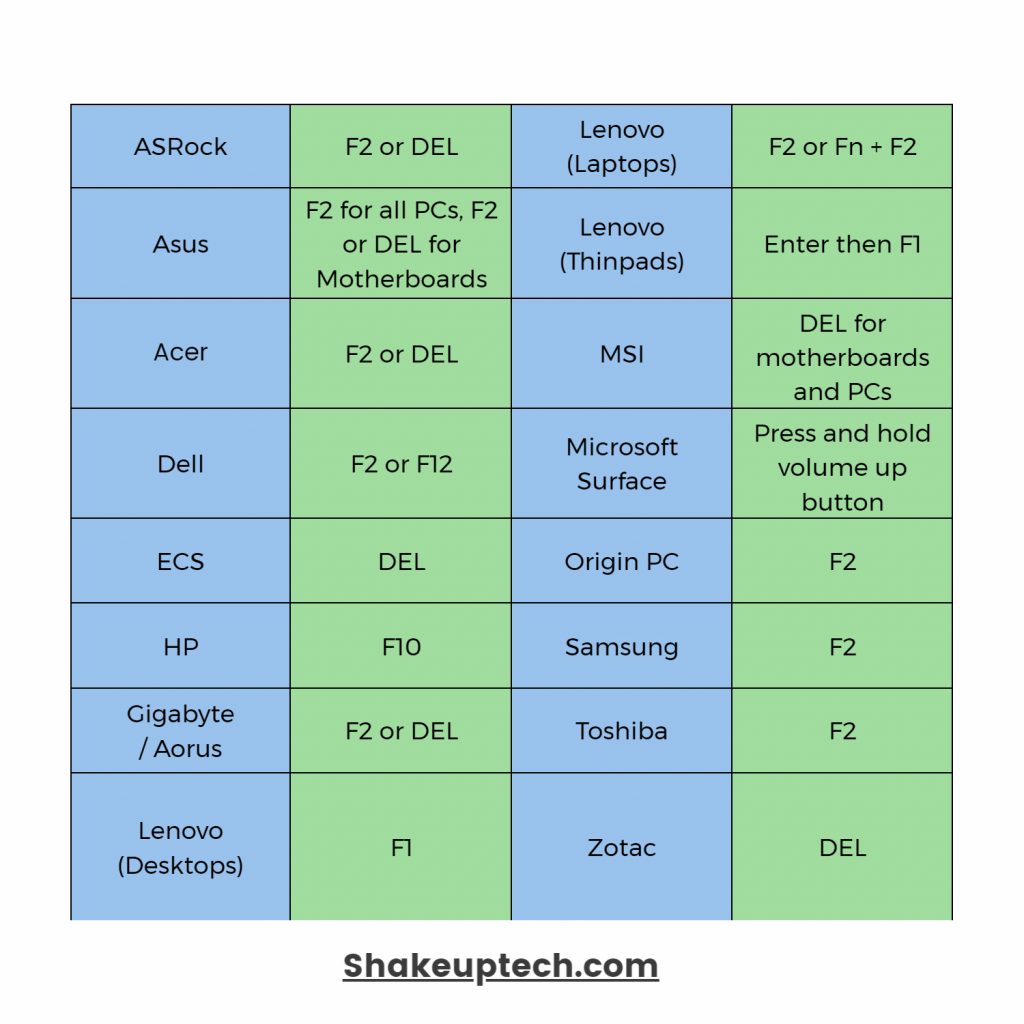
We need to disable secure boot from the BIOS of our computer. Different manufacturers have different keys to enter the BIOS. You can find the BIOS keys for various companies below. While you are here and if your system is a bit older. Also, find something called the “legacy boot” and disable that as well.
And lastly, we need to enable options related to virtualization. It is called Hyper-V for some just virtualization for others. On modern computers, it is enabled by default. So, if you don’t see such an option, then it must be enabled already.
Procedure To Get Google Play Store on Chrome OS Flex
So, initially, the process was quite long and required either a Windows or Linux Operating System. You can read the whole process here but basically, we did all the procedures for creating the Chrome OS Installer Images. We made these images for all four processors, that is hatch, rammus, volteer and zork. Users can simply download the Chrome OS Installer files from the link below and proceed with the next steps. Additionally, you can be rest assured that the images are in no way tampered with or have malicious files in them.
- Intel (6th Gen To 9th Gen) – Rammus
- Intel (9th Gen) – Hatch
- Intel (10th Gen) – Volteer
- AMD (Ryzen) – Zork
So download the appropriate recovery image for your processor and then we will move on with the further process. After downloading is finished, double-click on the RAR file and then copy the IMG image inside the Downloads folder. We need to rename this Chrome OS IMG file and add (.BIN) at the end. Do not remove the (.IMG) just add the (.BIN) at the end. This is necessary for the tool to recognize the images, otherwise it won’t.
For Rammus and Zork:
For Hatch and Volteer:
Chrome OS Installer image
Now, open the Chrome browser and go to the extensions option, then open the Chrome Web Store. Here search for the Chromebook Recovery Utility and then add it to the browser. You will see the tool in the extension area, open it and click on the gear icon. Plug in your USB flash drive (16 GB or above), in the gear icon select the erase recovery media and format the USB.
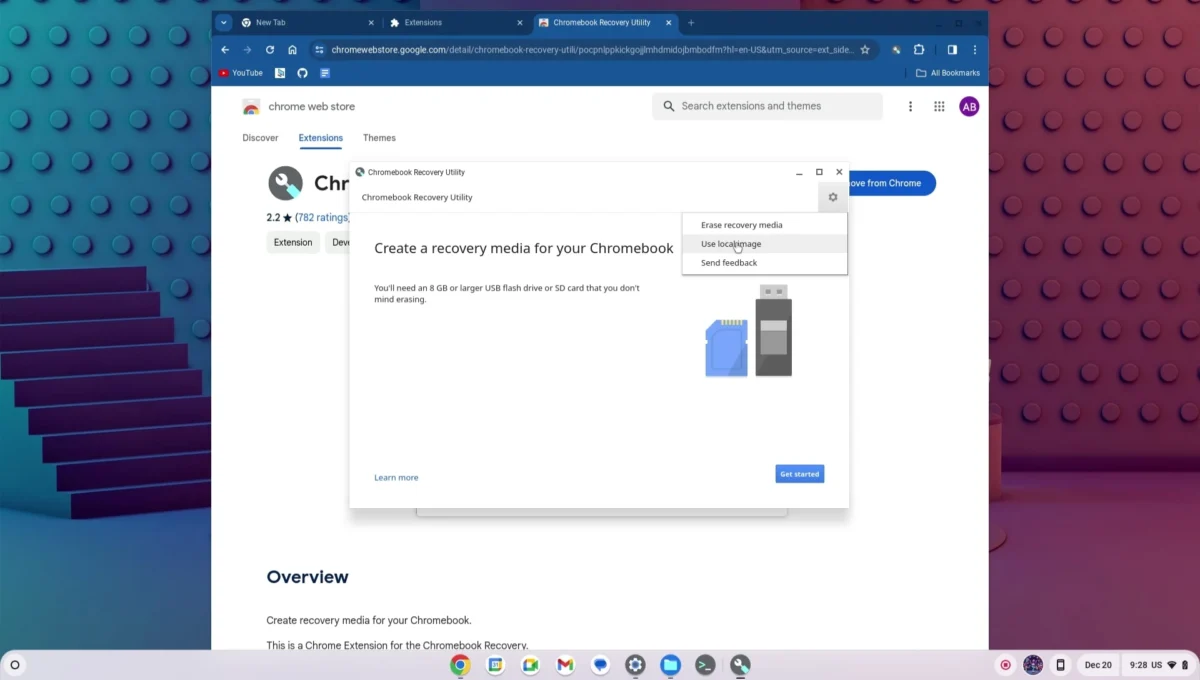
Now click on create another and then again click on the Gear icon and select use local image option. Here select the Chrome OS Installer image file and then start the flashing process. This will take some time, and once it is done we will power off our system and porceed with the next steps.
Install Google Play Store on Chrome OS Flex
Press the power button and the Boot menu key together, then click on the USB drive to boot into the Chrome OS. You will see the Brunch logo and then something about patches and rootfs, and this can last from 30 mins to an hour. So do not touch anything and let it continue and soon you will see the Chrome OS logo.
When the welcome screen pops up, we can then select our language and connect to the wifi network. Now when you see the add Google account page just press the Ctrl + Alt + F2 on the keyboard and it will enter the terminal. Firstly, type chronos to login to the terminal and run commands. Then we will run the command to figure out our main partition name. So type lsblk -e7 and it will show you all the different partitions on the system storage. Look for the biggest size and note down the main name . For example, sda will have multiple small partitons like sda1,sda2, etc, but sda will be the main partition name.

If the terminal does not open, then try pressing the Ctrl + Alt + Fn + F2
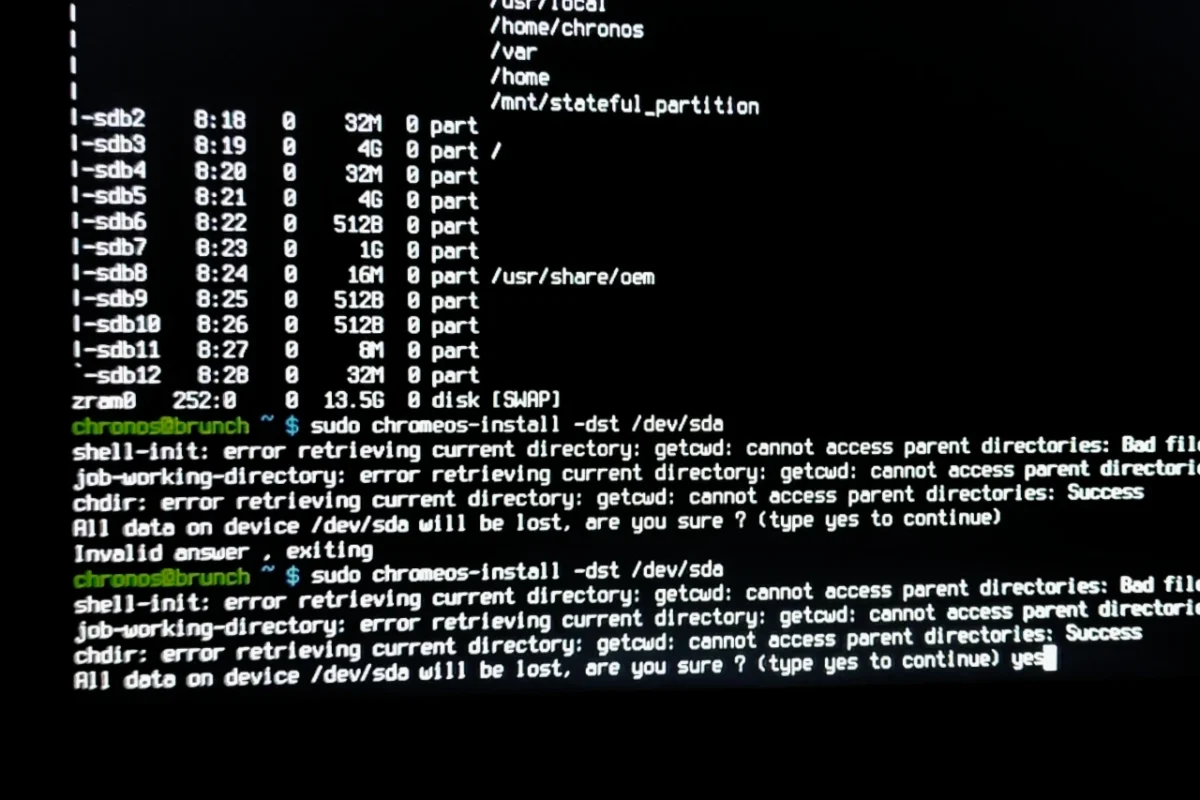
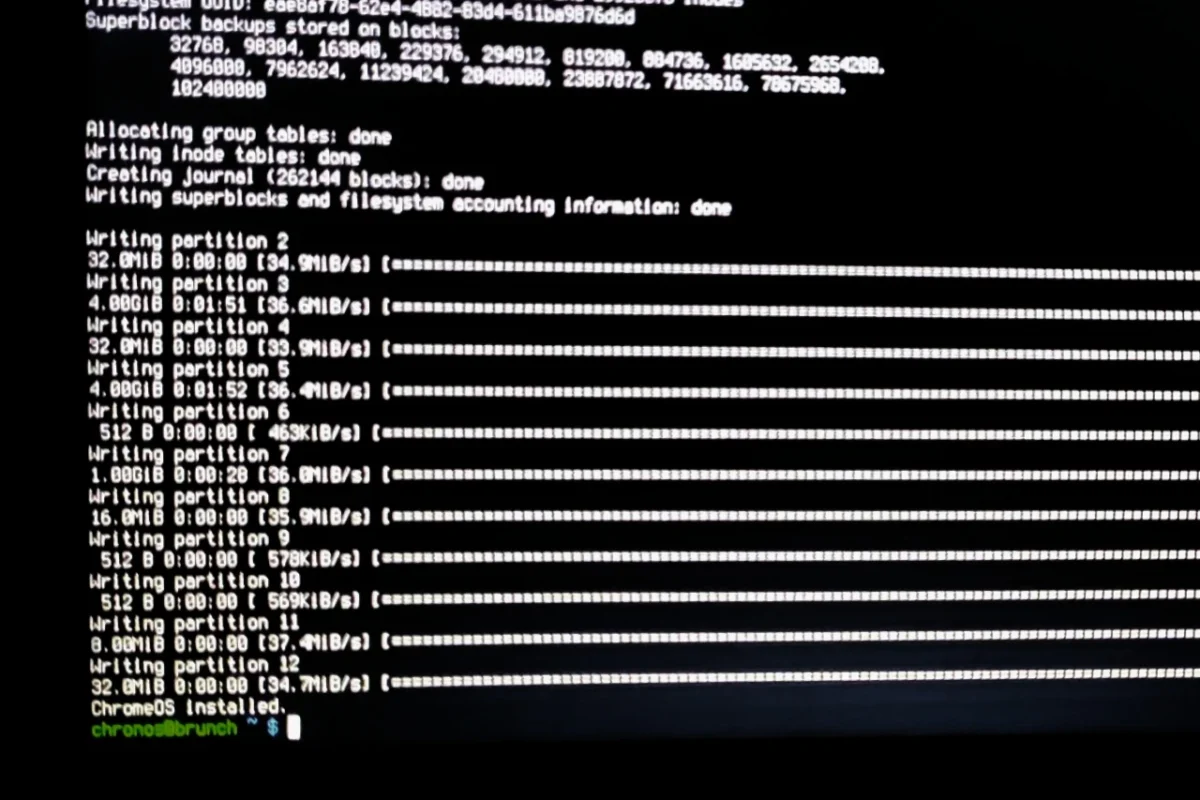
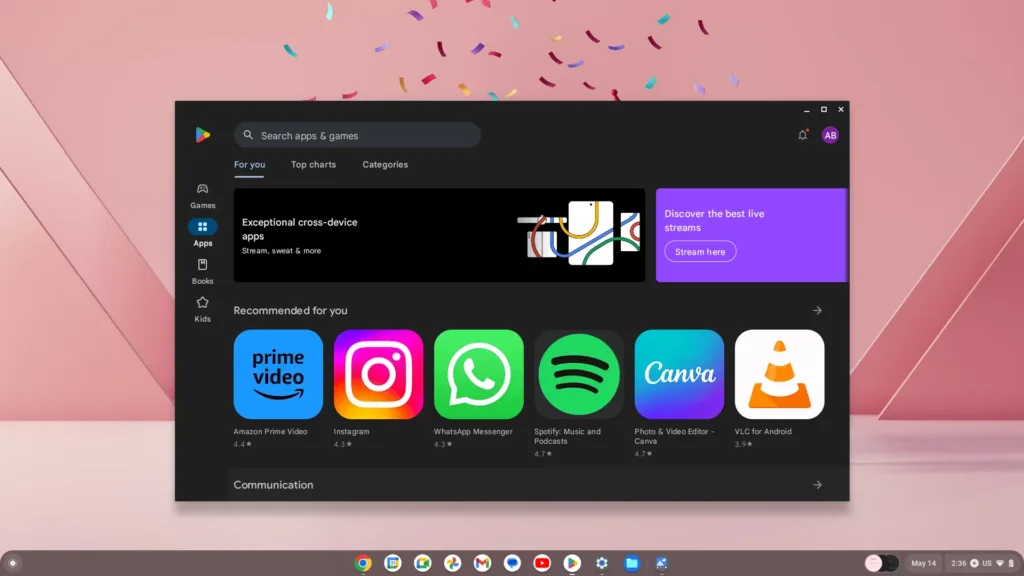
Type in the following commands and replace the name “disk” with your target disk. sudo chromeos-install -dst /dev/disk The scrip may show some errors but ignore that and cofimr the installation by typing “yes” and enter. The installation will take a long time and will show chromeos installed at the end. Now press the Ctrl + Alt + F1 to exit the terminal. You can use the quick toggle to power off the system and then remove trhe USB flash drive. Now you can power on the system and it will boot into the newly installed Chrome OS with the Google Play Store.
Recommended Articles
How To Download and Install Chrome OS with Google Play Store!
Dual Boot Chrome OS and Windows – Install Without Linux or USB!
Chrome OS Flex – A Blessing From Google? Download & Install!

