Pear OS is a fairly popular Linux distro. Its popularity is mainly because of how it looks. The whole interface of Pear OS is based on Apple’s macOS. There are other Linux distributions that try to take inspiration from macOS but Pear OS takes it too seriously. The icons, toggles, and various other elements are all macOS-inspired. Even the different version names like Monterey, Thiccsur, and Catalina are inspired by Apple. Let’s see how we can Dual Boot Pear OS Monterey and Windows 11.
Dual Boot Pear OS Monterey and Windows 11
System Requirements:
- Secure Boot Disabled from BIOS
- 20 GB of Disk Space
- 8 GB USB
- UEFI BIOS Preferred
- To Dual Boot Pear OS Monterey, we need to first download the Pear OS Monterey ISO of Pear OS. We are downloading the Monterey version. There is a newer Pear OS NiceCore version. But it does not support Dual Boot installation.
- Additionally, the official downloading link for the Pear OS Monterey ISO file is no longer available. If the download speeds are low, try downloading it with an external download manager like IDM or XDM. Once the download is finished we now have to make a bootable USB using the Pear OS Monterey ISO image.
- We will be using a program called Rufus to make the bootable drive. You can get the program from this link. This installation method will be for UEFI-based systems. There is no mention of whether MBR is supported or not, so you can try it with that as well.
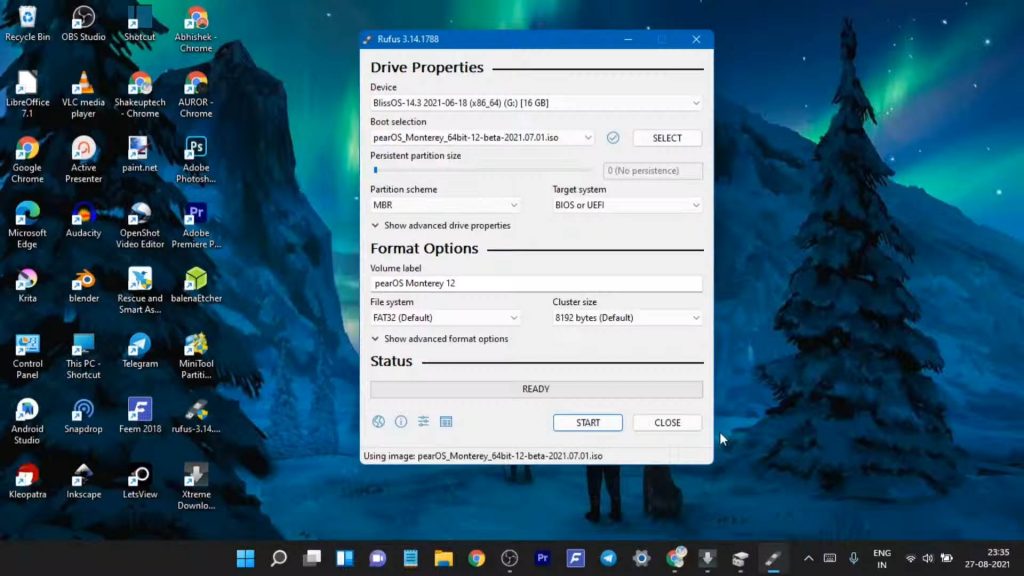
- Once we open the Rufus program, it will automatically select the USB drive. The USB should be 8GB and above. Now we need to select our Pear OS Monterey ISO image and then set the partition scheme as GPT. Then just hit the start button and the program will format our USB and make it a bootable drive.
- If you encounter any error during the process, close the Windows File Explorer and resume the process. The process will take some minutes and then we can proceed further.
Creating Partition
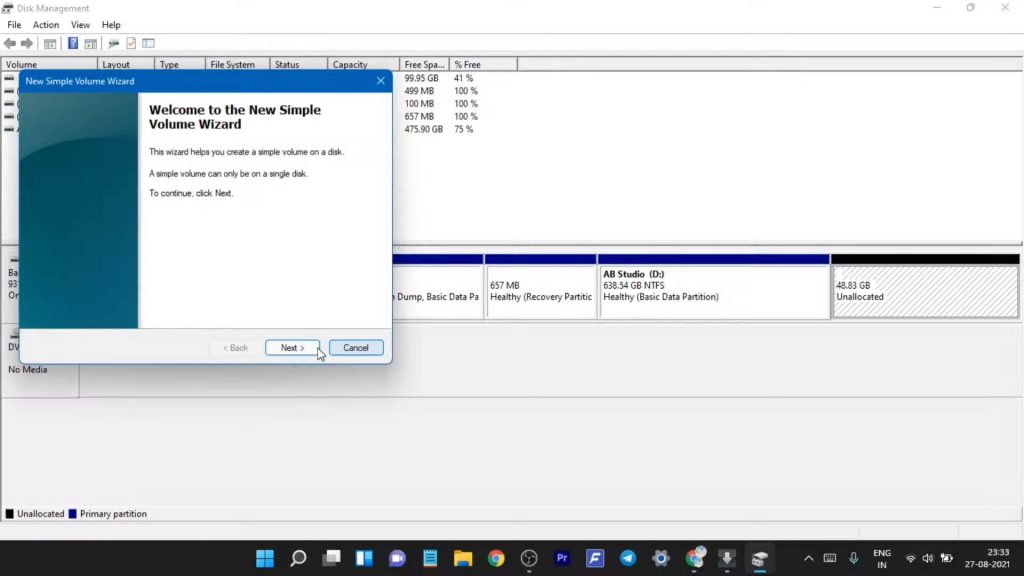
- To proceed further with the installation of Pear OS Monterey, we need to create a partition on our computer’s drive. Open the Windows search bar and type “ partition”. Open the Create partition and format the hard disk program from the list. This program is going to help us create partition space to install Pear OS. Right-click on the D drive and then select Shrink.
- We need at least 20GB of partition space. So type 20000 MB and then click next and finish. We will have 20 GB of unallocated space. Right-click on the unallocated space and then create a new volume. Follow the on-screen process and we will have a 20 GB partition ready to be used.
Pear OS Monterey Installation
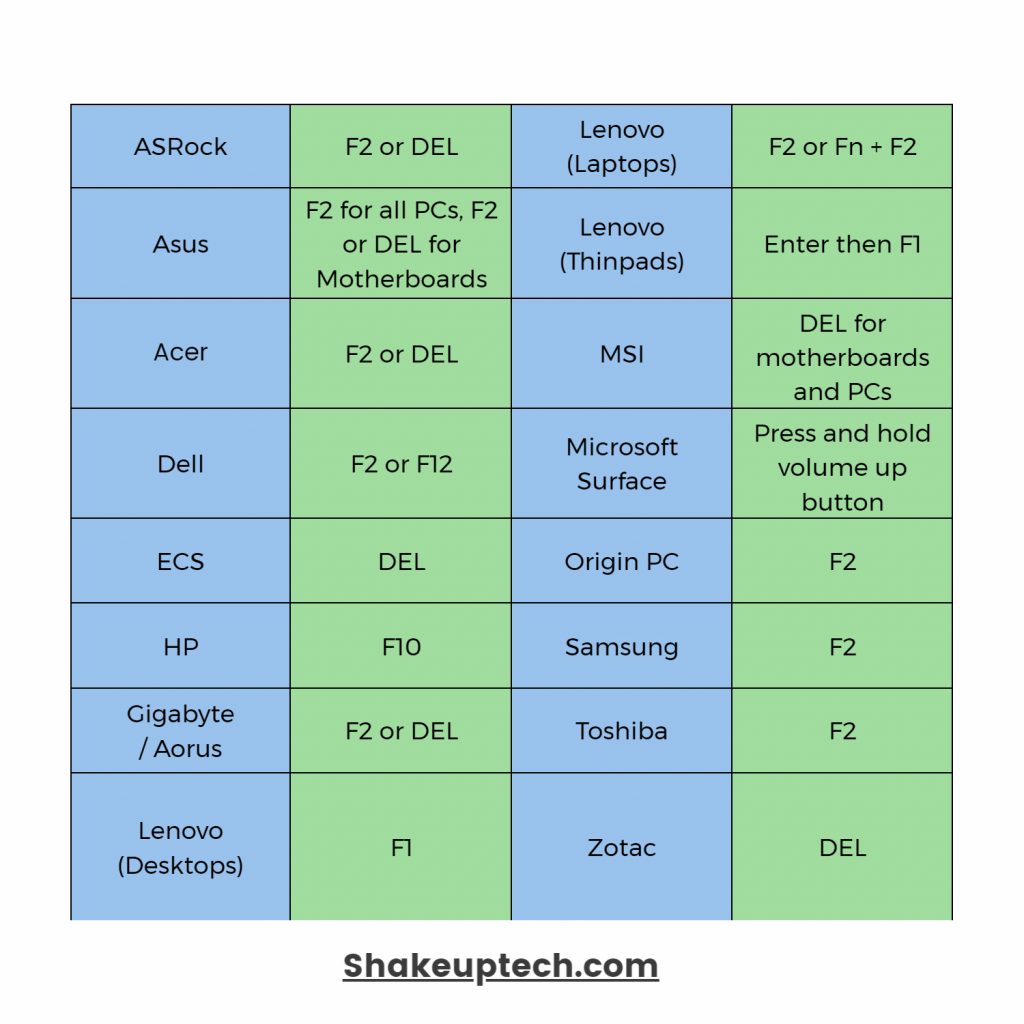
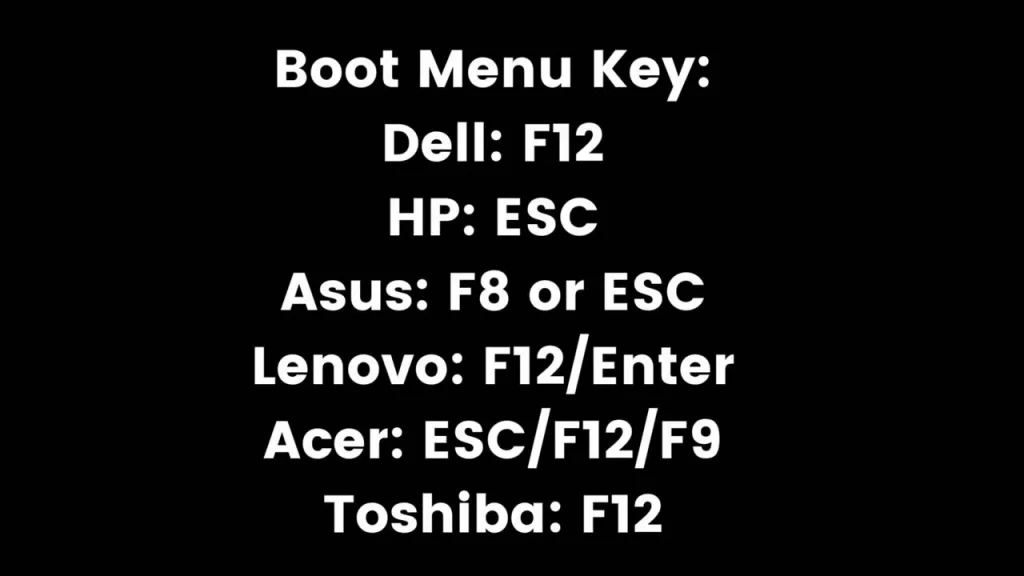
We have to now boot into the BIOS of our system. So the device I am installing this is an HP laptop with an i5 6th gen CPU. The BIOS key for HP is F2 or ESC, I have provided an image with all the OEM BIOS key shortcuts. So let us boot into the BIOS and then select Boot Device Options. You can also boot directly into the boot menu using the Boot Key.
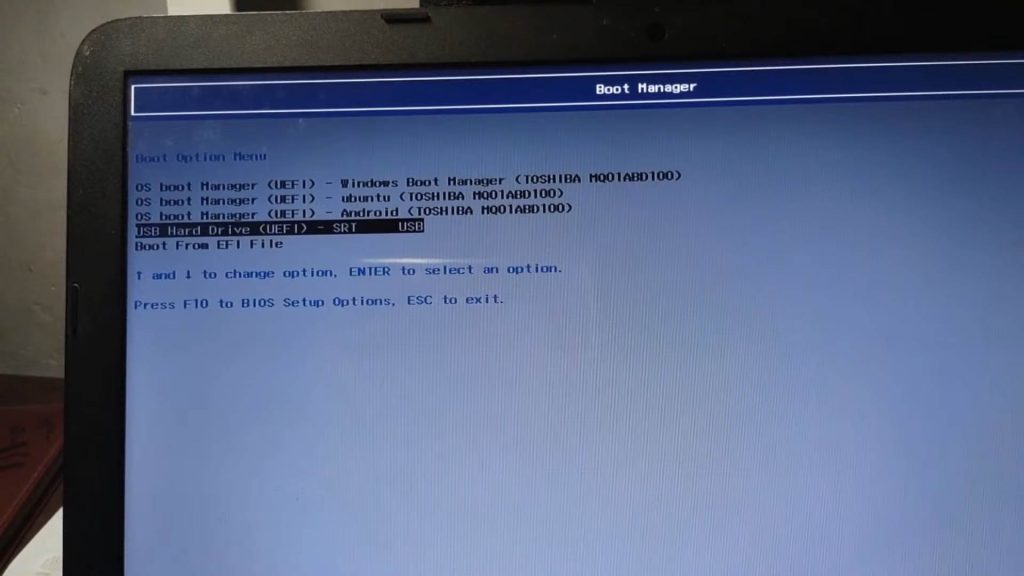
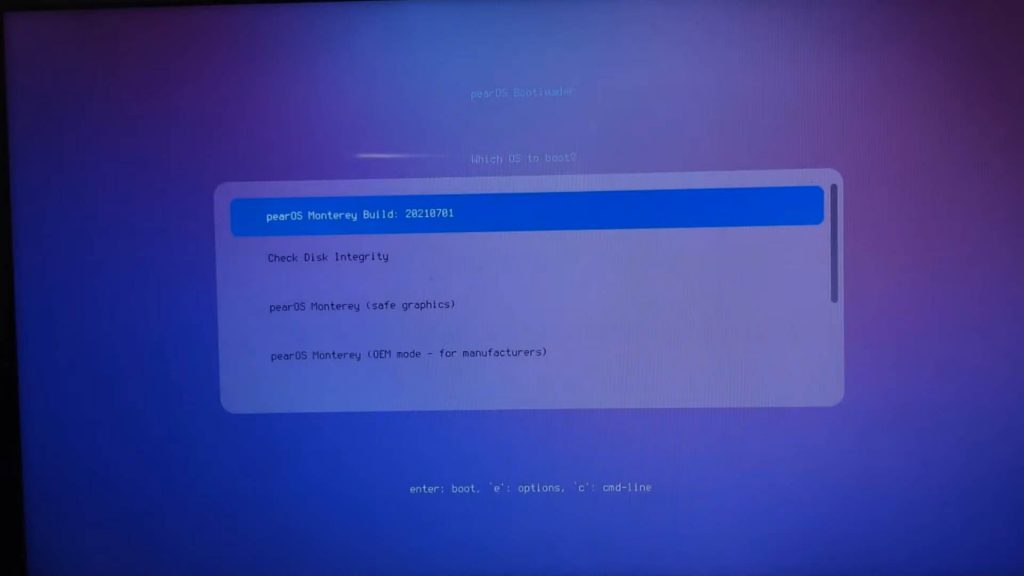
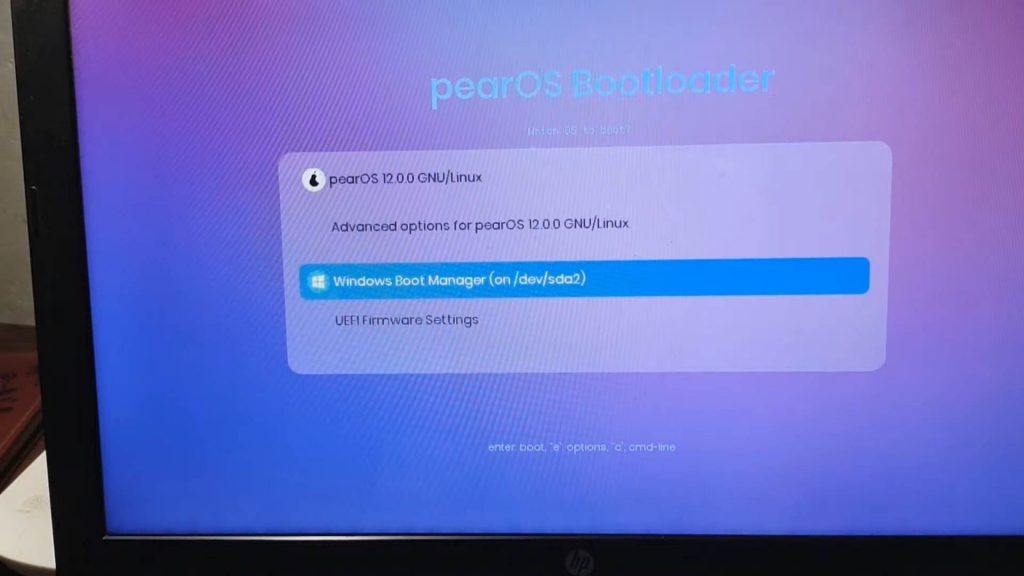
Here we need to find and select our bootable USB to start the installation. Once we select the USB, the names of different Pear OS files will appear. To install the operating system we need to select the first option, “Pear OS Monterey Build“. There will be a black screen with some texts but soon we will be in the Pear OS Monterey interface.
- This unlike many other Linux Distro does not have an installation interface right in the beginning. We can explore the user interface and check how it is performing. It is similar to a live preview version, we can check for compatibility first and then go ahead and install it later.
- On the home screen, we can see the Pear OS Monterey installation wizard program. We need to open that and it’s going to guide us through the installation process. We see this kind of installer in Linux Mint and Peppermint OS as well. It makes the experience better than a simple direct installation.
Let’s Dual Boot Pear OS Monterey
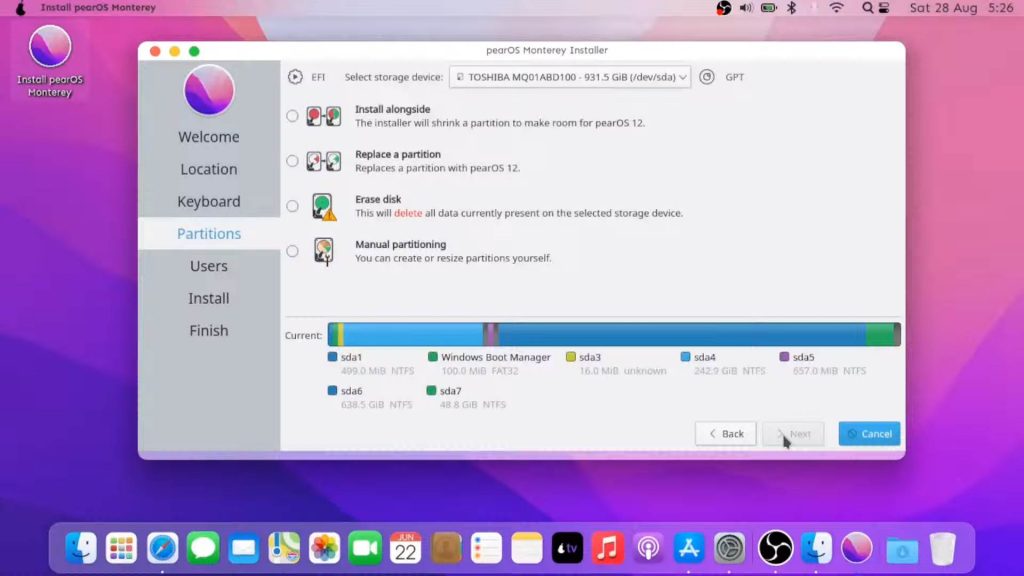
- In the installer, we need to select our location and timezone first. Then we get to the important part of selecting the partition. As we have already made the partition in advance we can choose the “Replace a partition” option to Install Pear OS Monterey in Dual Boot.
- You can also choose to manually create and resize partitions if you want to alter the sizes. Then we need to select our drive, we can locate it by the size of the partition we created earlier. When selected, It will get highlighted and then we can proceed to install Pear OS Monterey. Also, it automatically uses the Windows EFI as a boot partition.
In the next step, we have to create a username and password. Then the real installation will begin. This process can take a whole lot of time. But once it is done the system will restart and we will be greeted with the dual boot menu. We can now choose to boot into Pear OS Monterey or Windows respectively.
Read Dual Boot Arch Linux with Windows 10/11 UEFI | Step-By-Step Commands
Pear OS Monterey – My Experience
So the first impression of Pear OS Monterey was awesome. The whole interface felt smooth and very vivid. We can notice the macOS-style icons and design language right off the bat. There are amazing blur effects in the various menus and transitions.
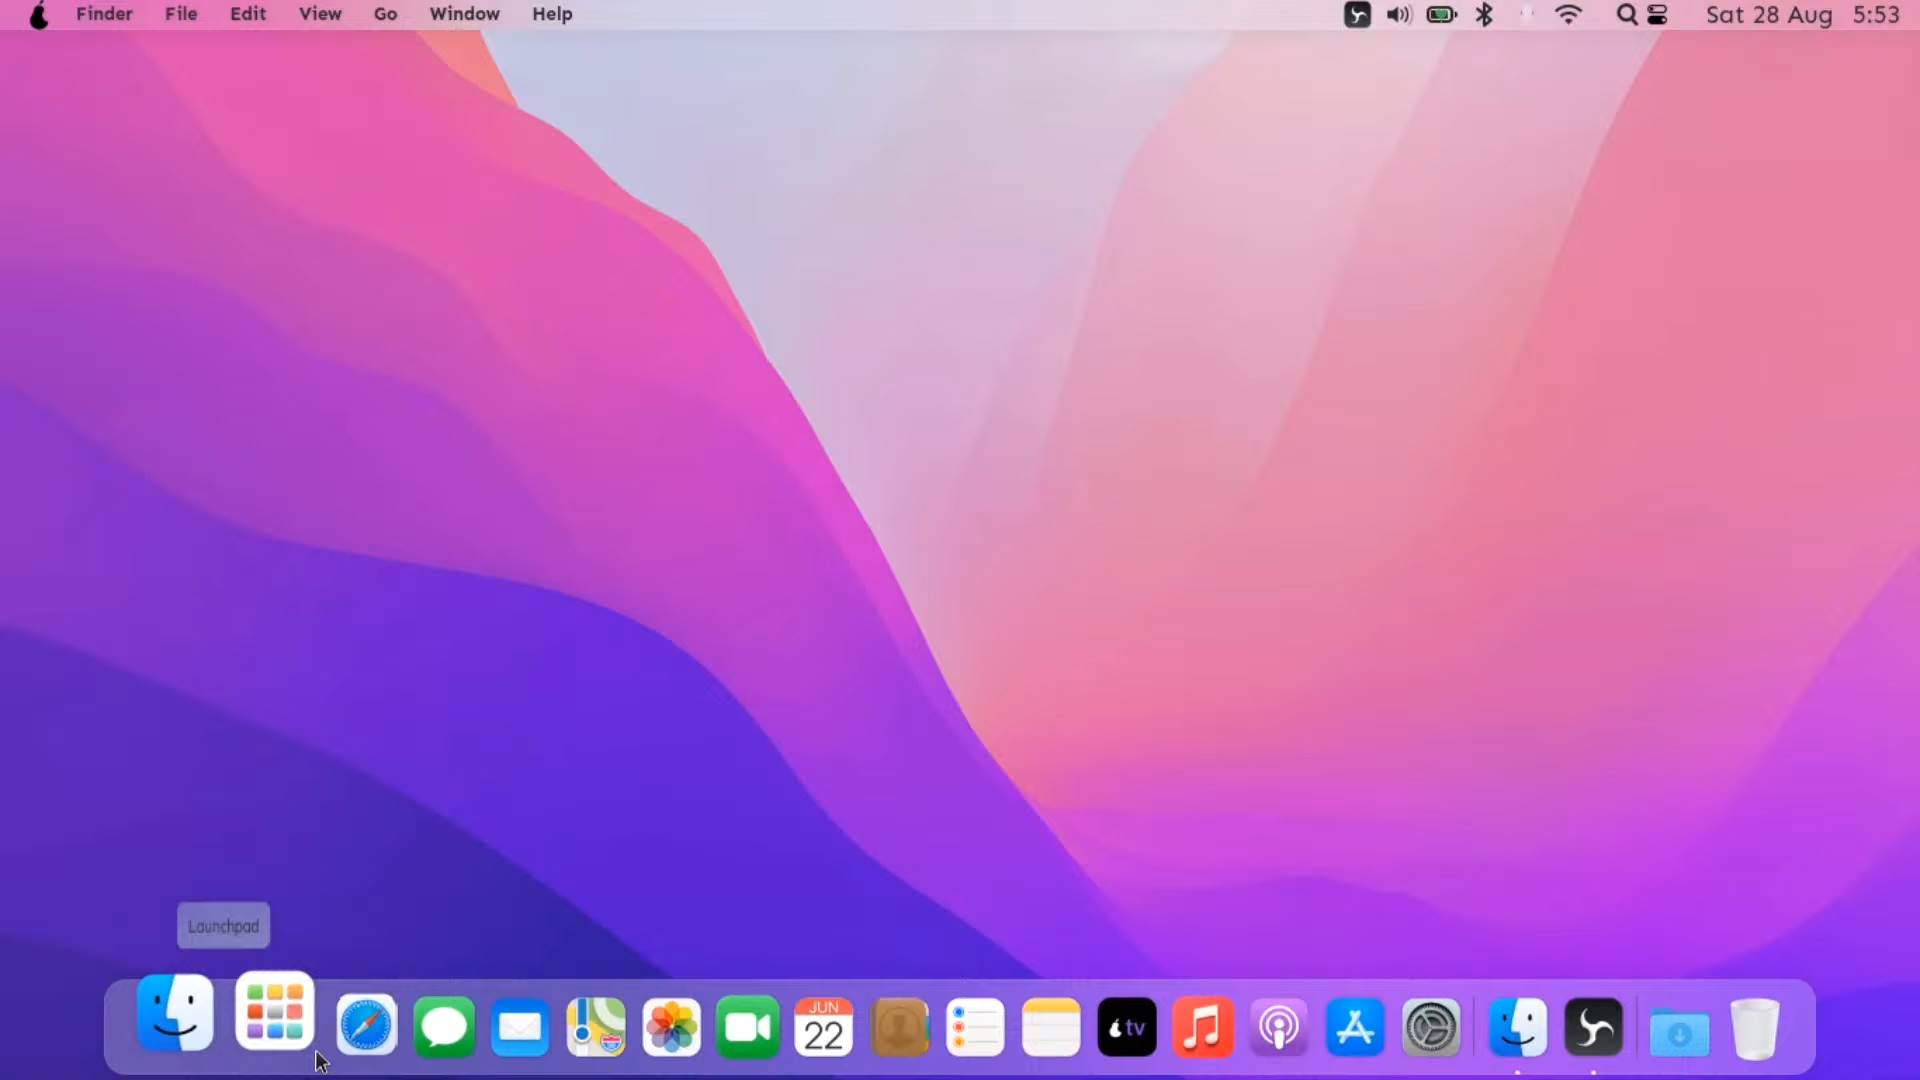
- We get the jiggly effect that we do in the macOS when we select a program. The application’s open and closing animation is quite awesome as well. So basically we see almost all the elements from Apple’s macOS in the Pear OS Monterey, and I am not complaining here.
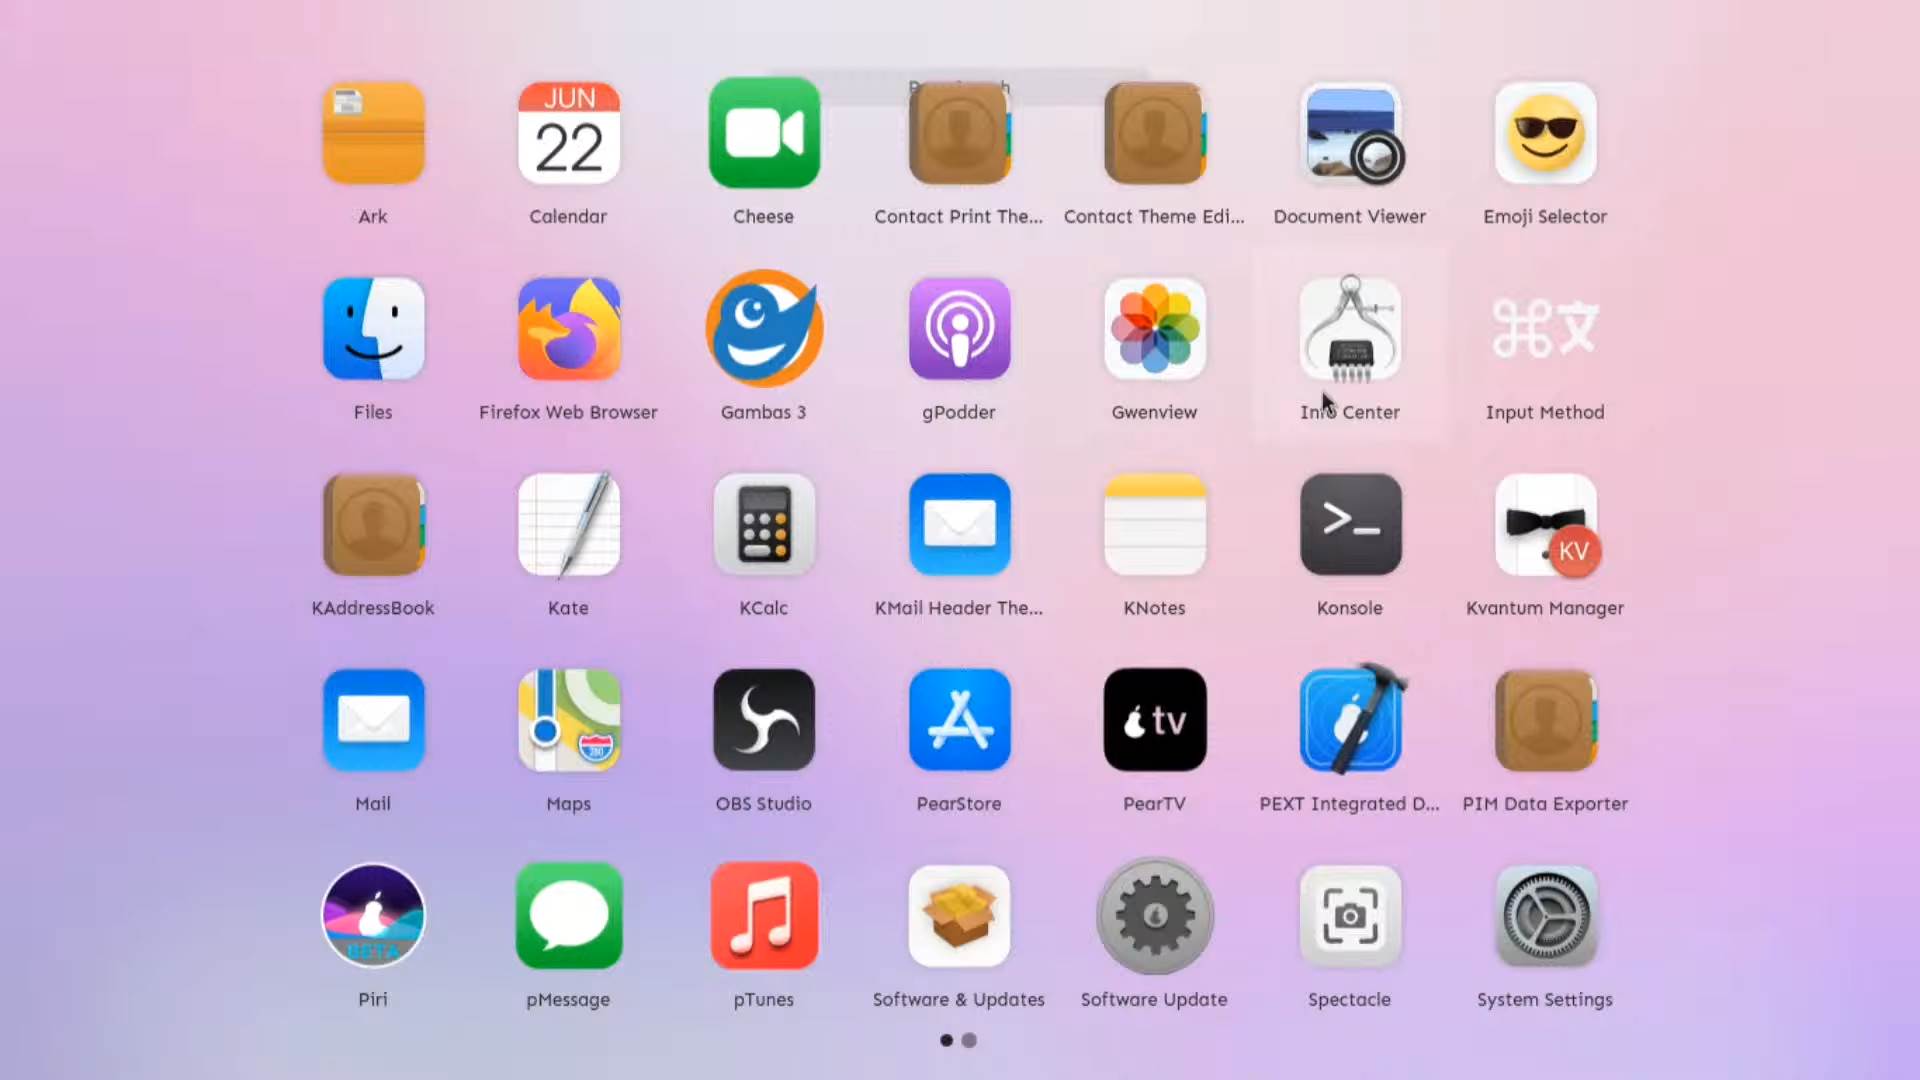
- The experience is amazing and very smooth. The naming of different apps is similar too, we have Pearstore, ptunes, PearTV, and more. The browser is made to look like the Safari browser and is quite pretty. The PearStore is very helpful as it contains a lot of the Linux programs that are needed. It’s always nice to have a built-in applications store.
Conclusion
I would recommend trying this Extraordinary Linux Distribution once. It is very fun and nice to use. The animations and transitions are quite well done. The developers have put a lot of effort into mimicking the macOS. I can certainly vouch that it shares a huge resemblance to Apple’s macOS. So that was how to install and dual boot Pear OS Monterey. Do try this once and tell us in the comments how you felt about it.
DOWNLOAD Pear OS Monterey ISO Image HERE. Do watch the below video to show support for the efforts.