Prime OS is one of the most popular Android OS out there for PC. Android emulators are too hard on the system and tend to use a lot of resources. Lower specs computers cannot run them at their full capacity. Android OS is like Windows and can be installed on a partition. It does not take a toll on the processor and requires that many resources. Let’s see how to Dual Boot Prime OS and Windows 10/11.
1. Dual Boot Prime OS 0.6.1 Android 7 Nougat [STABLE]
1.1 Create Partition To Dual Boot Prime OS
But first, let’s create a partition to Dual Boot Prime OS in our storage. Open the search icon on your Windows PC and search for Partition. A program called Create Partition should show up. Open the program. Apart from your C drive, there should be a bigger D drive. We’ll shrink this partition to make another smaller partition. You can choose the size of the partition as you desire. But choose above 15 GB at least.
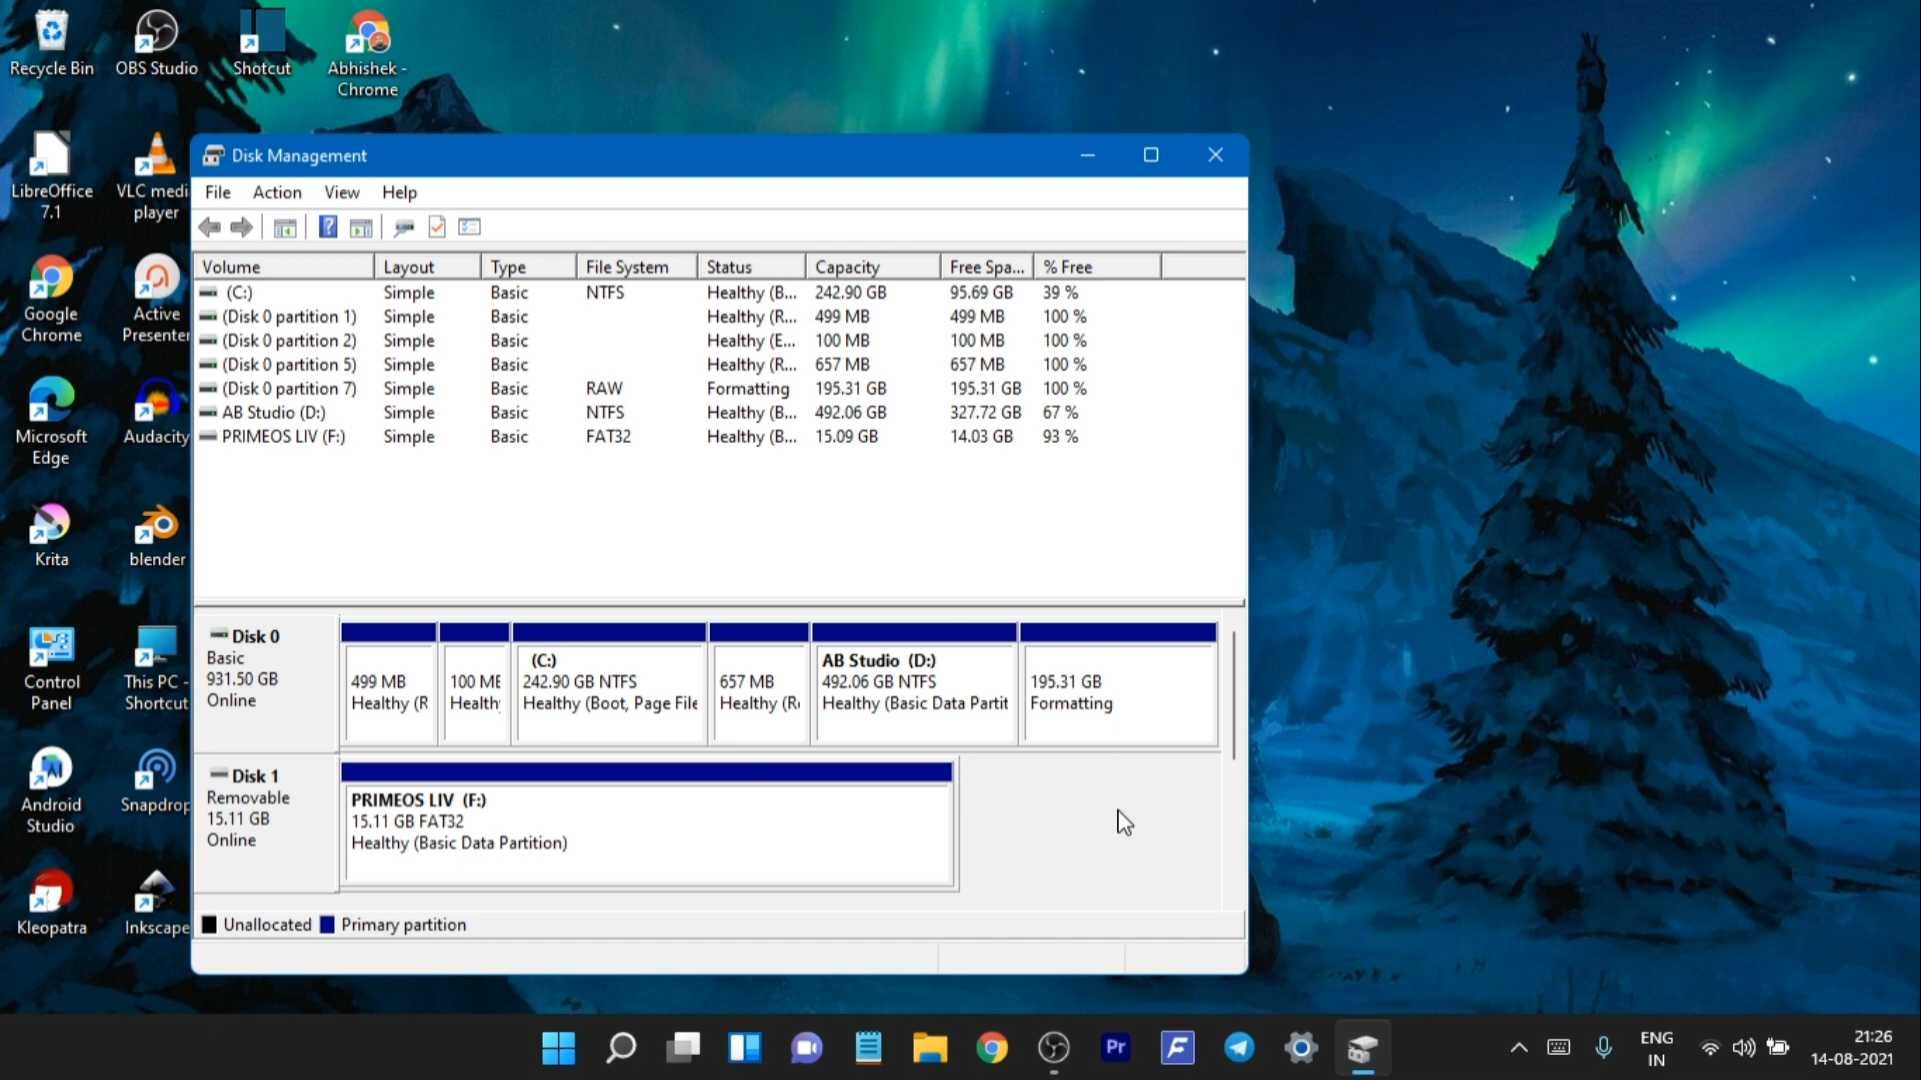
Right-click on the D drive and click shrink. Then put in the size of the partition you want to create for 50 GB you will type 500000 MB. Then click create and a new partition will be created. While we are here we’ll also determine our storage partition scheme. Right-click in the Disk 0 and select properties. Then under the Volumes tab, you can see your Partition scheme. For me, it shows the GPT partition.
1.2 Download
We need to download the Prime OS ISO file from their website. You will have three versions of Prime OS to choose from. (Classic, Standard, and Mainline)
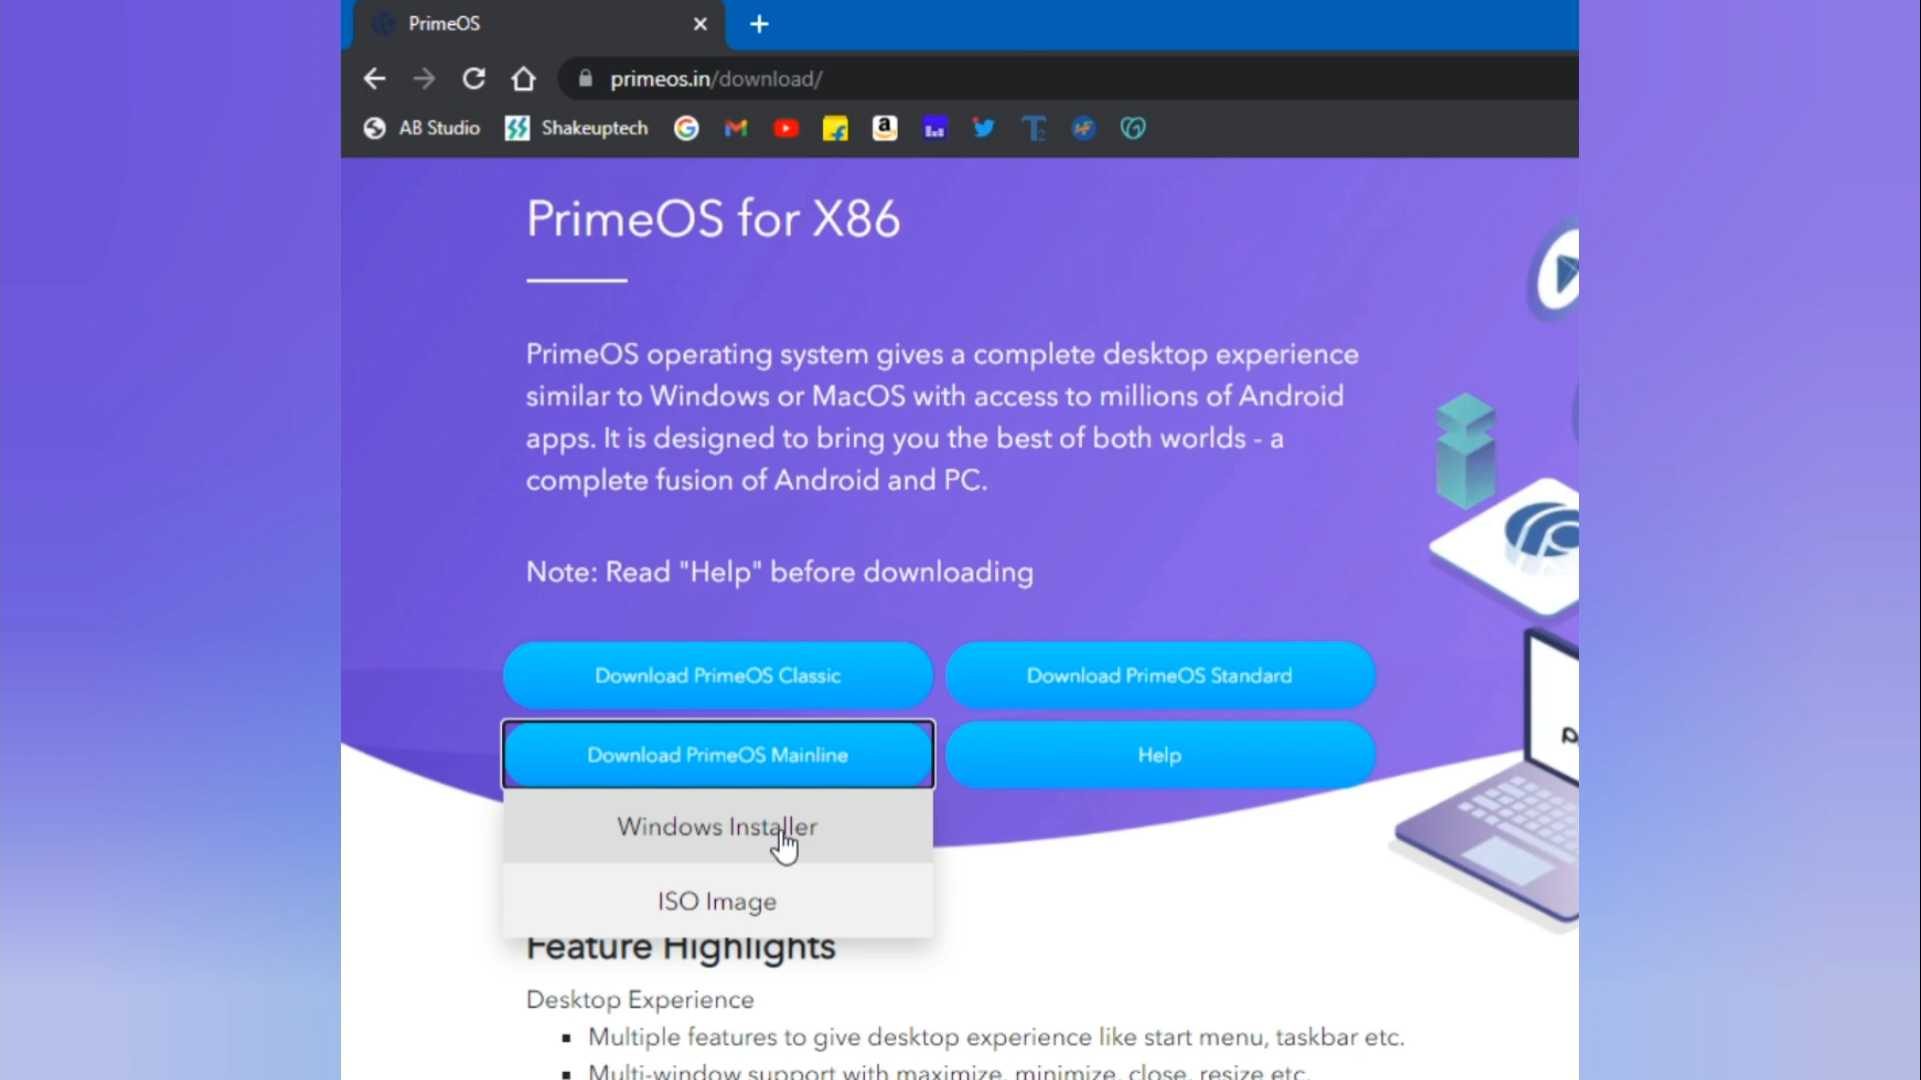
Classic is for processors older than 2011. For example intel 1st generation, Celeron and Pentium, or dual-core processors. Standard is for processors newer than 2011 and Mainline is for processors newer than 2014. Intel i3 and newer ones should go for the mainline 64-bit version. I’ve used the Mainline version for my usage as my processor is i5 6th generation. Once you have downloaded the aforementioned file, we need to burn it as a bootable USB.
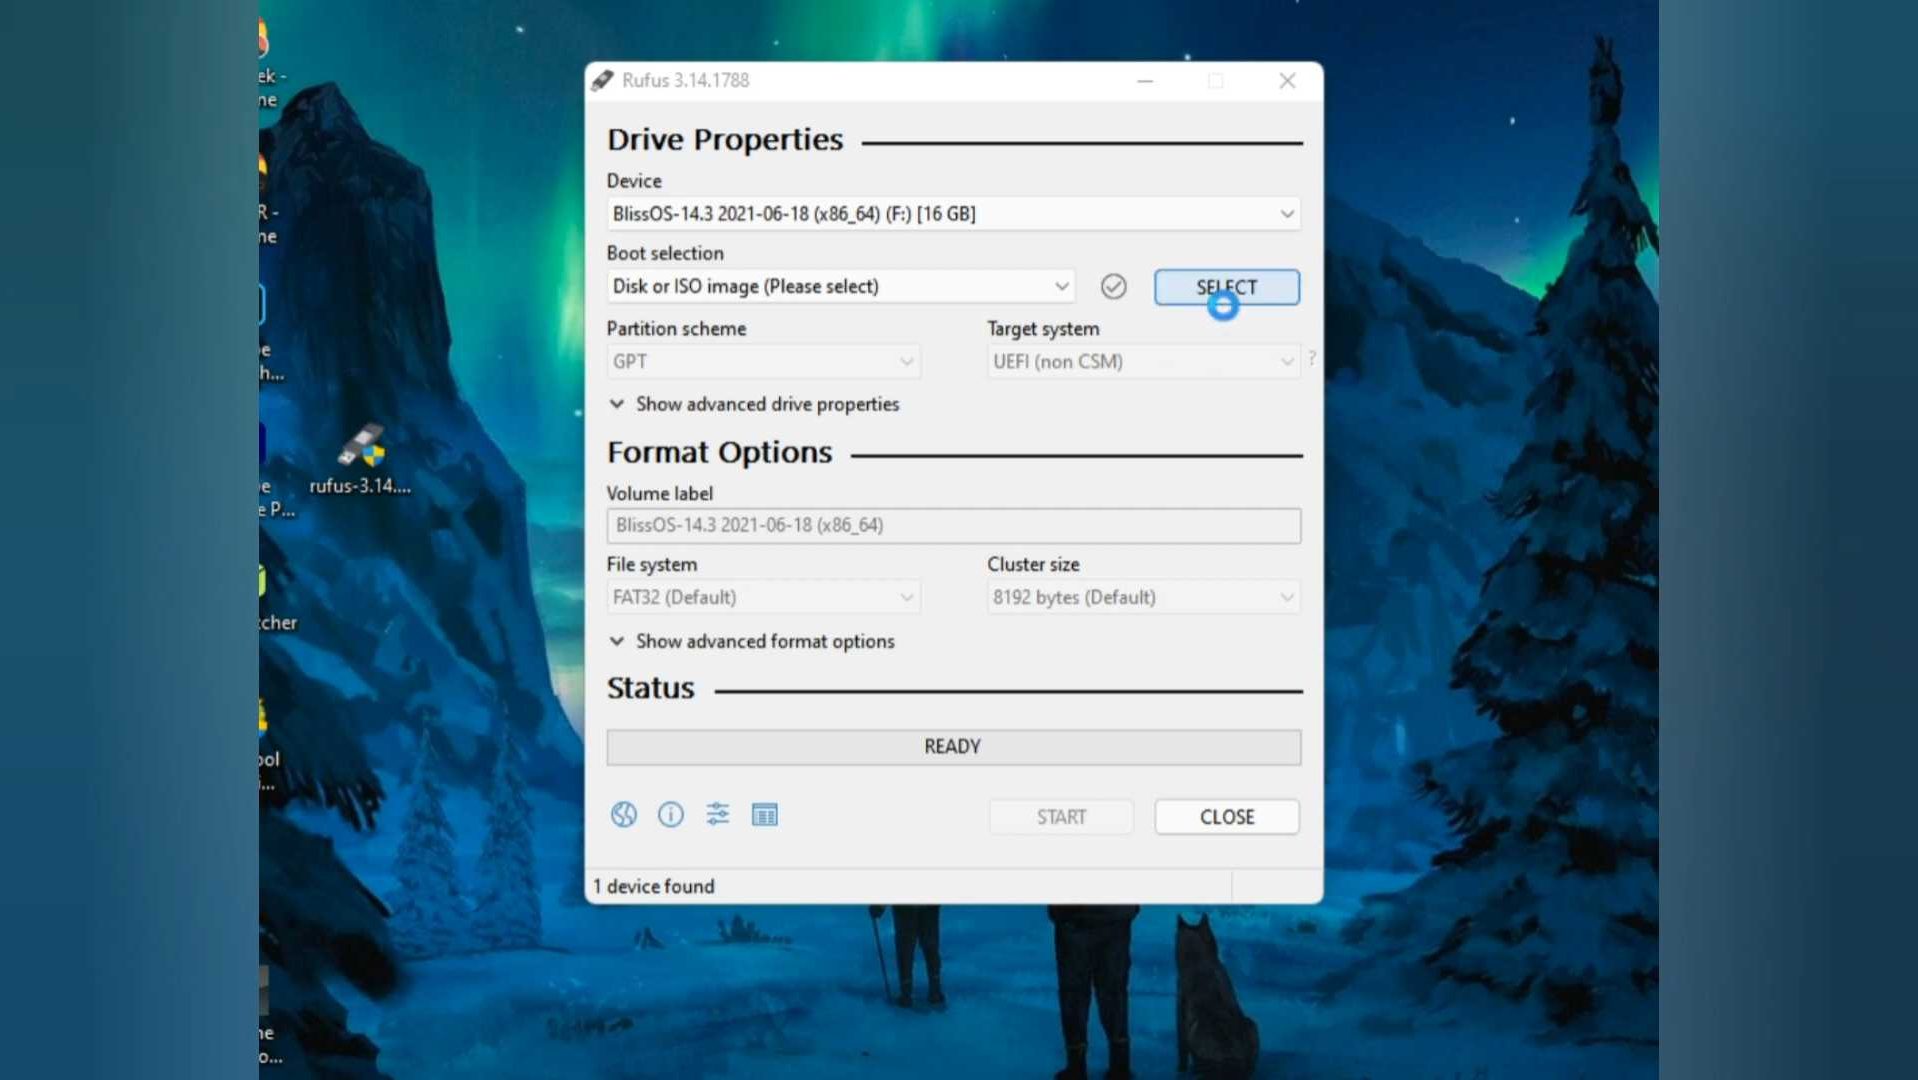
Now that we have our new partition ready let’s move on to make your bootable USB drive for Prime OS. We will use a program called Rufus. This program helps us to make bootable USB drives. Open Rufus and select your USB (8GB or Above). Select the Prime OS ISO file and choose the partition scheme. Now click on start and it will format the USB and make it a bootable drive.
1.3 Prime OS Installation
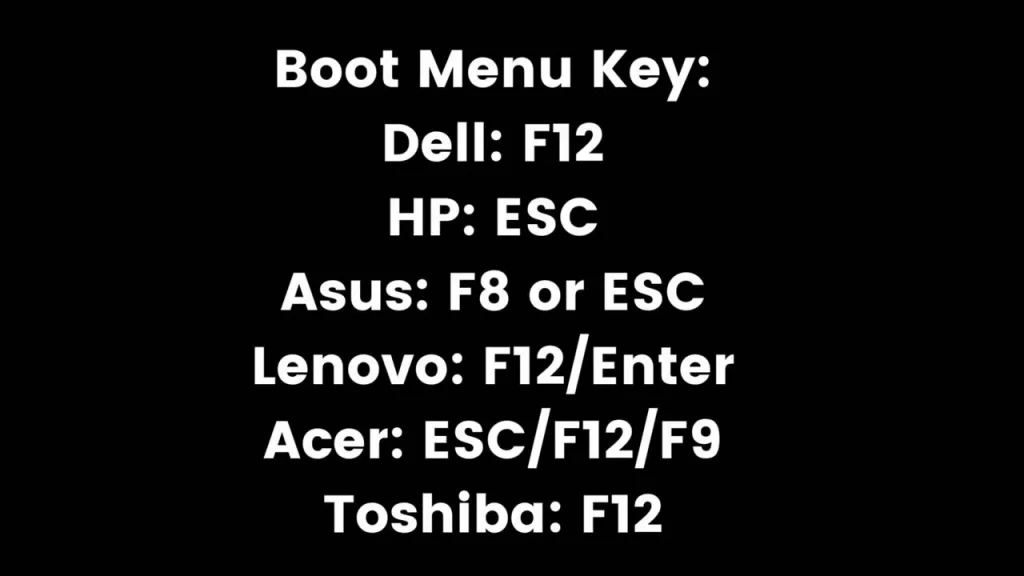
For the installation process, we need to boot into the BIOS of our system. For my HP laptop, the shortcut key for BIOS is the ESC button. You can check your Boot Menu Key from the image below. Restart your computer and while it’s restarting press the Boot button.
Now you’ll see the list of storage devices connected. Choose the USB drive that we’ve created and the Prime OS installation window will start up. Select the option named Prime OS installation. Then a menu will appear listing all the partitions and storage.
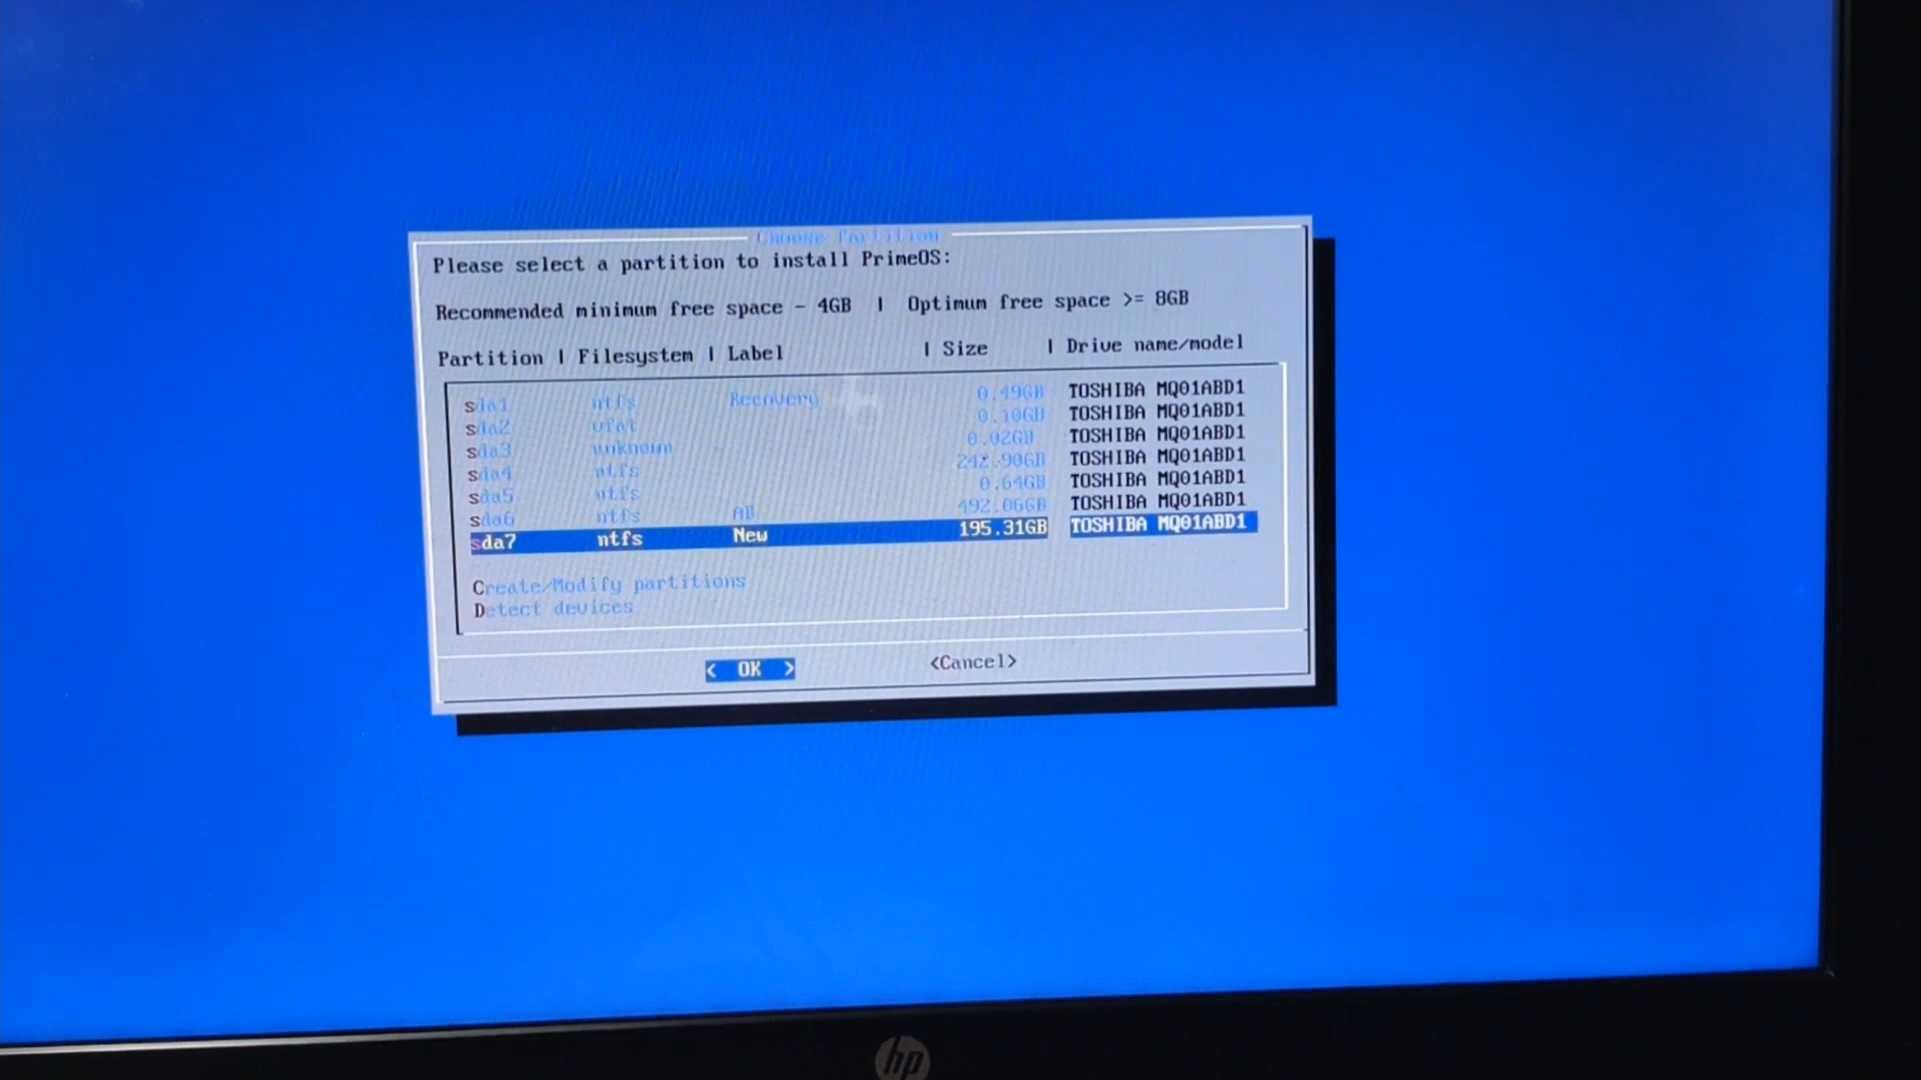
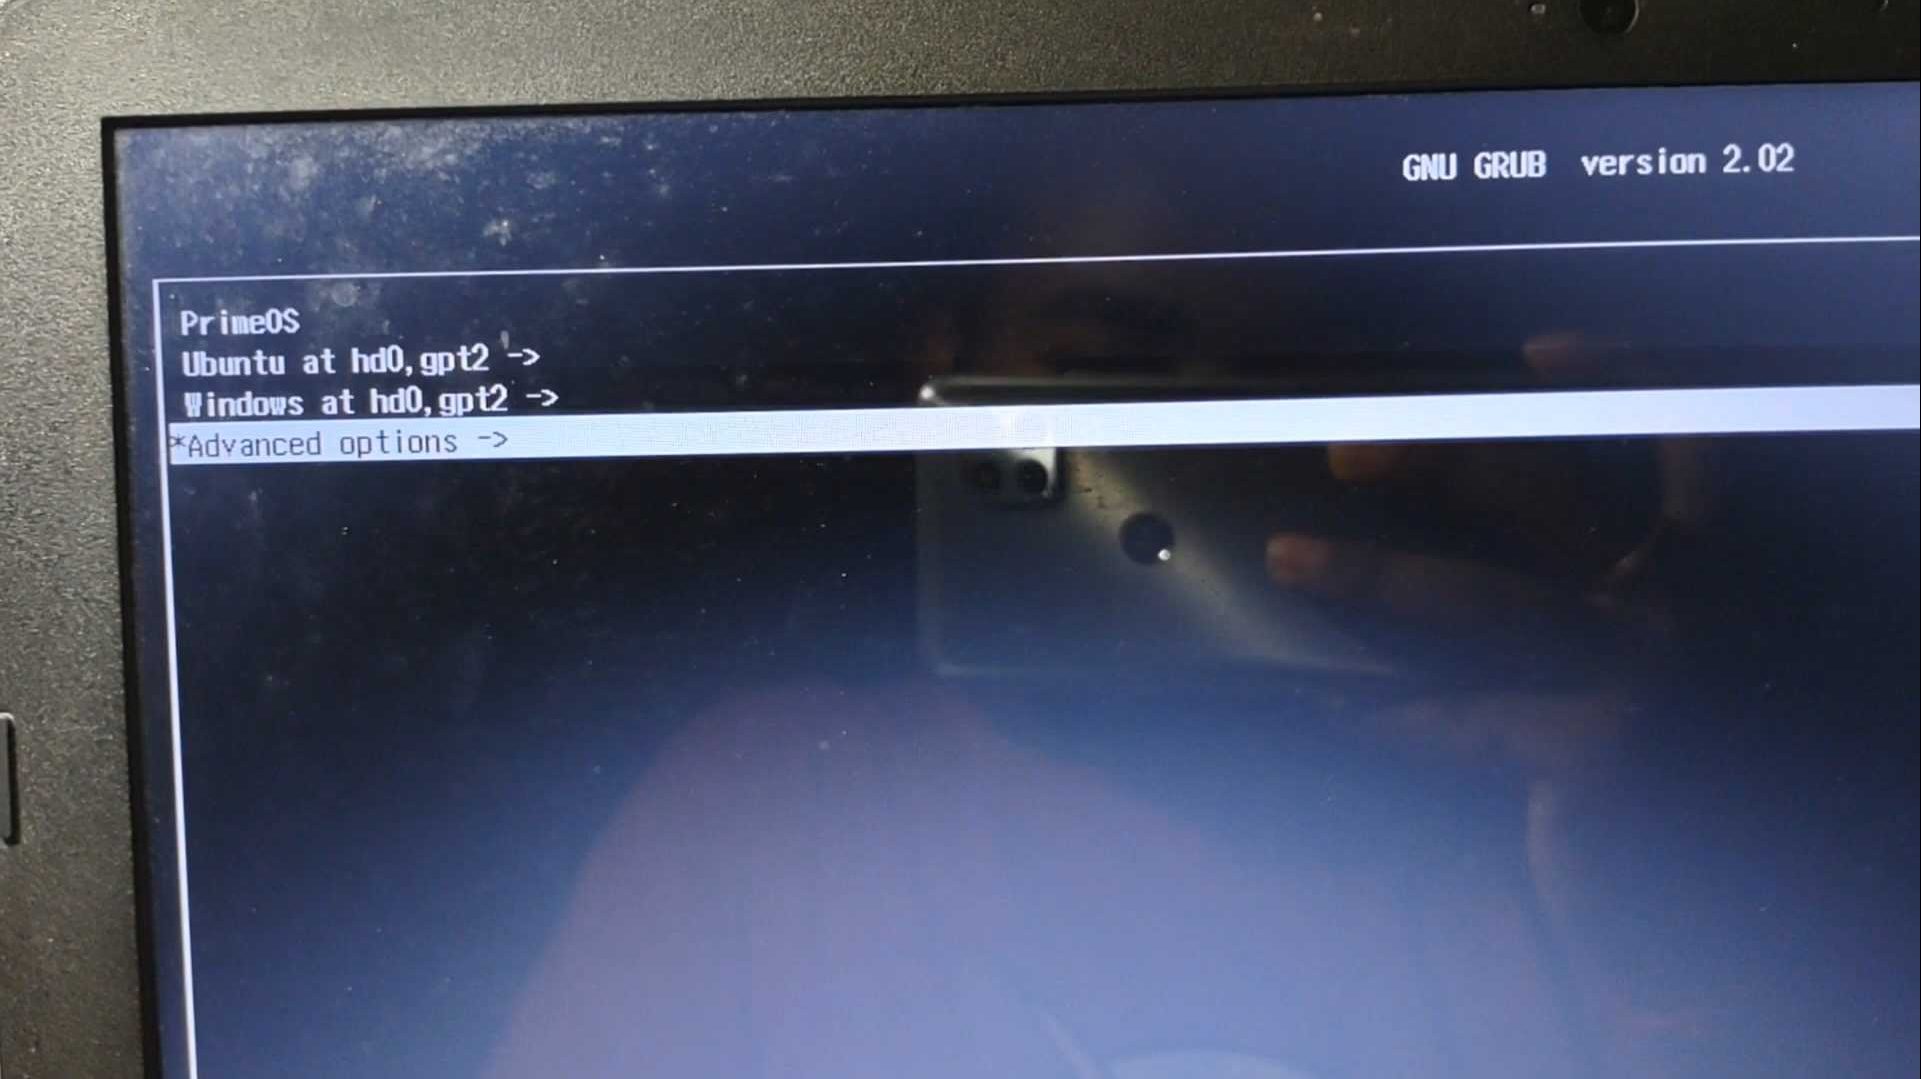
Select the partition that we made by remembering the size of it. Next, select the format as Ext4 partition. It’ll start the installation process. You’ll be asked to create a grub menu, select yes. Select Yes to all the windows that will appear thereafter. Once it’s done you will see an option to Run PRIME OS. Now every time you restart your computer you will see a screen confirming booting into Prime OS or Windows.
Read Dual Boot Fyde OS with Windows 10/11 UEFI!
1.4 Prime OS for Android Games
If the option doesn’t appear simply boot into BIOS and from boot device options select Android boot loader. Now you can explore the Prime OS and use all the Android apps you want. Sign in to your Google account and access the Play Store. Only apps from the Google Play Store work for me. Games tend to crash before even opening.
You can play PUBG, BGMI, or Free Fire but make sure you download them separately from 3rd party websites. Like an1.com, Apkpure, etc. You can install the app and copy/move the OBB file manually.
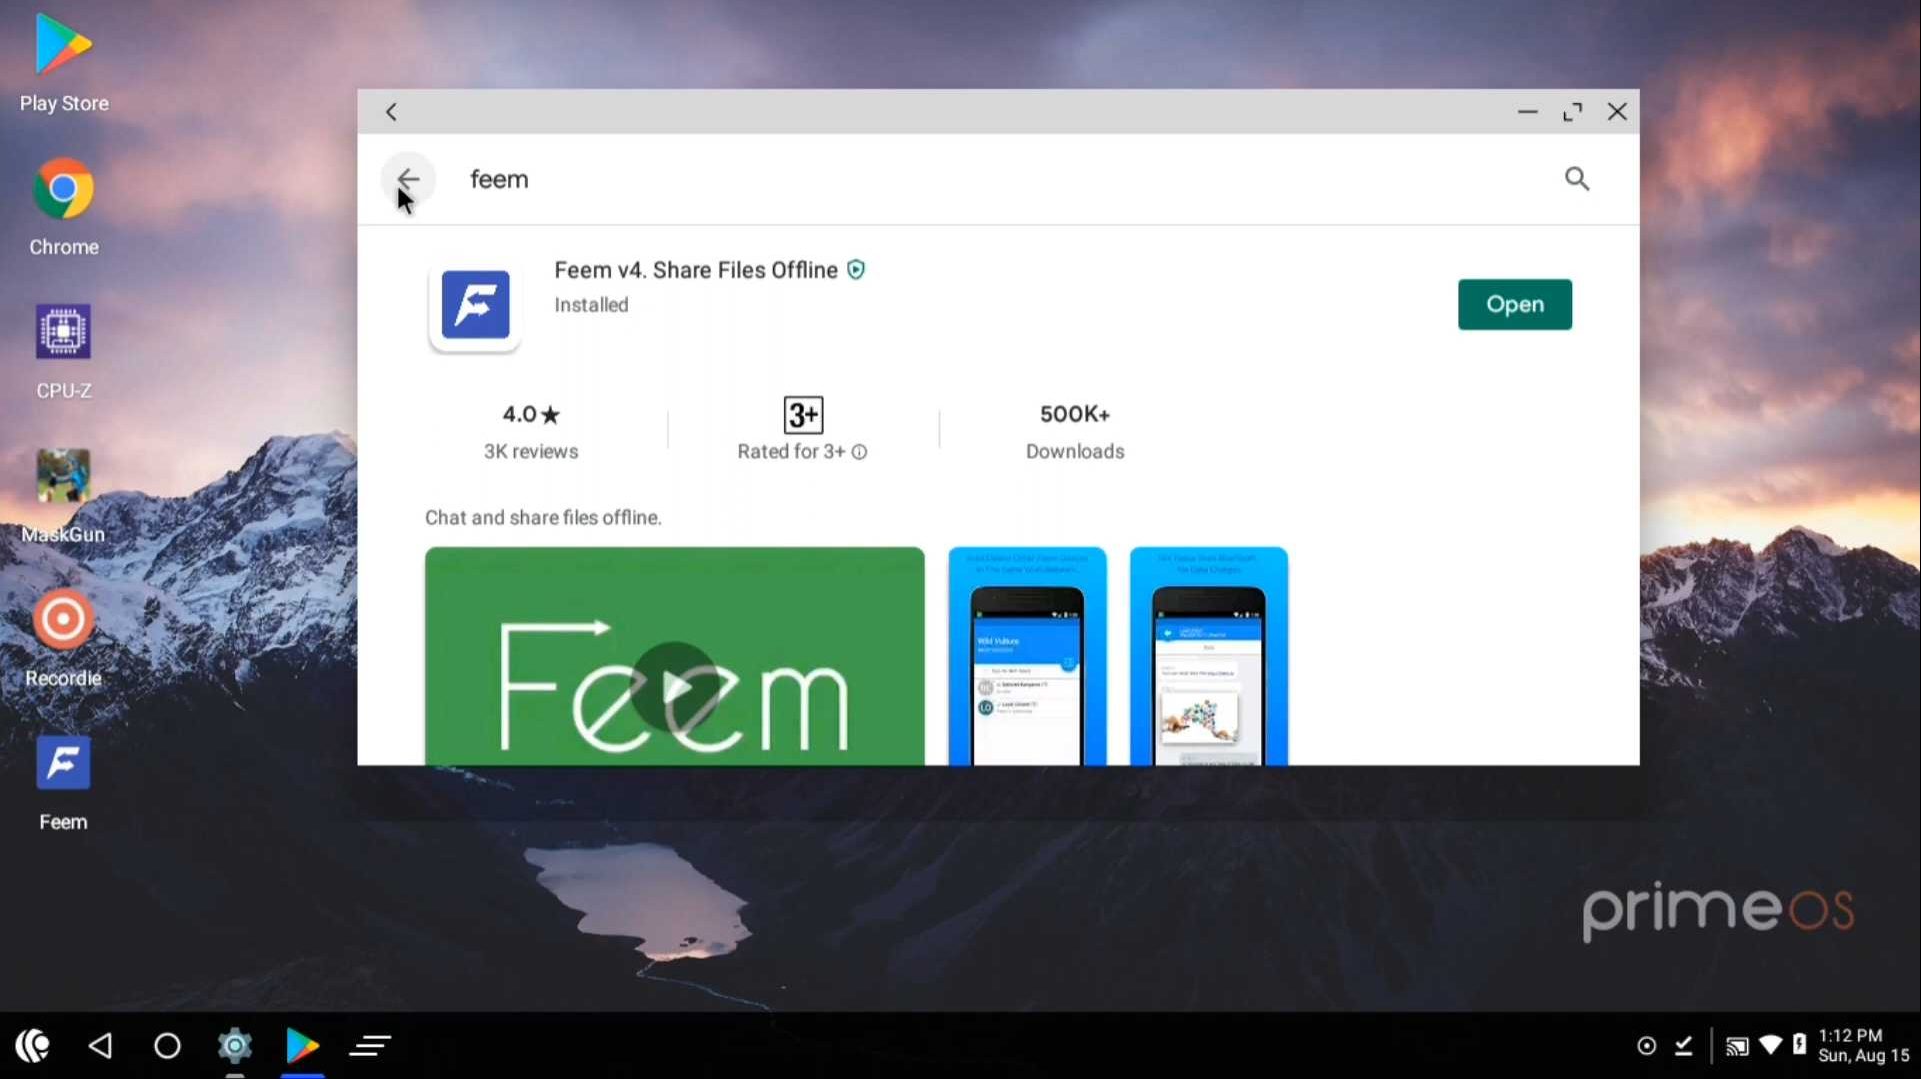
So there you have the procedure to Dual Boot Prime OS on your laptop or computer. It runs really smooth and if you have a dedicated graphics card it might give you better performance.
2. Dual Boot Prime OS 2.0.1 Android 11 [UPDATE]
2.1 Download
We need to download the ISO file for the Prime OS from this download link. Unlike the Android 7 version which had multiple versions like classic, standard and mainline. The Android 11 Beta is only available in one version. And I believe we should only try this on newer CPUs like after 2014.
2.2 Install Prime OS Android 11 in Dual Boot
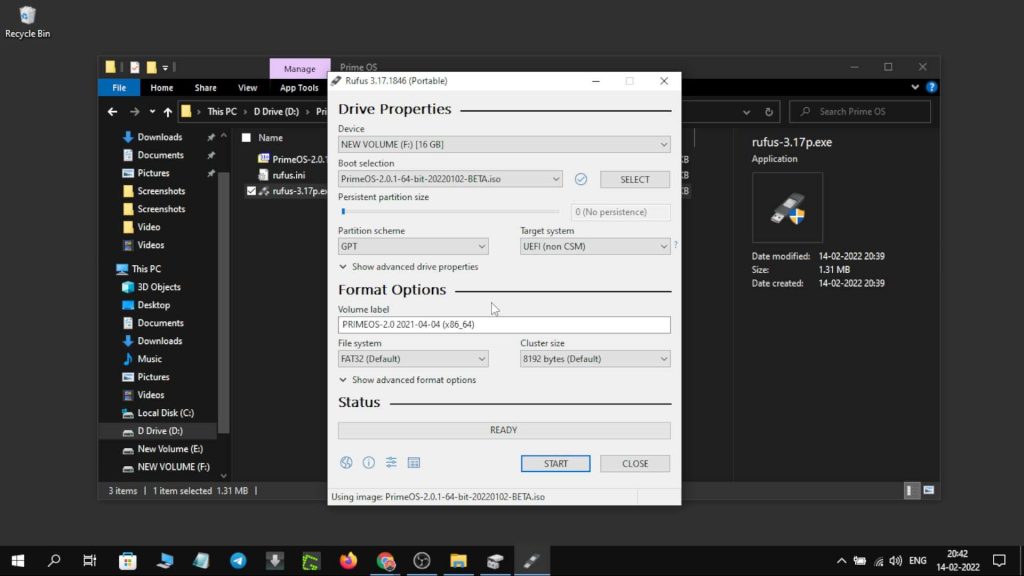
We need to Install Dual Boot Prime OS on a bootable USB. We can make a bootable USB with the help of Rufus. Download and install the application. After launching the program we can see it automatically detects our USB. The USB should be 8GB or above. Choose the ISO file from the browser and change the partition scheme to GPT.
There is no information on support for MBR on the website for Android 11. After doing the process, press start, and Rufus will format the USB and install the Prime OS ISO. If for some reason you encounter an error while creating the bootable USB. Then close the Windows Explorer and then the process should be fine.
2.3 Creating Partition
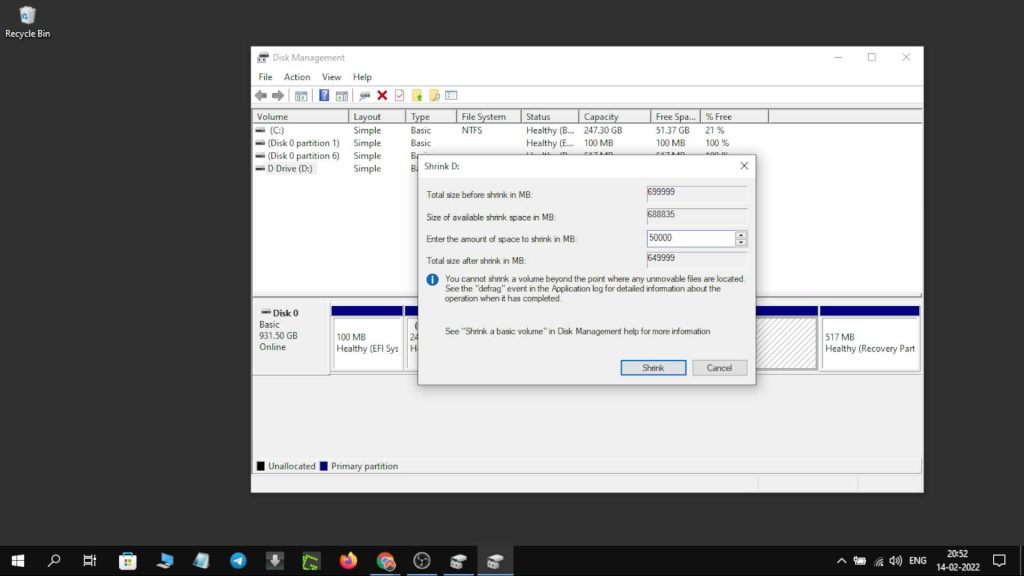
We need to create a partition on our drive to install Dual Boot Prime OS Android 11. Open the search bar and search for Create Partition. Open the Create and format hard disk partition program. You will see all your drives listed there. We can shrink the D drive to make space for our Android 11 OS.
Right-click on D drive and select Shrink Volume. Choose the size in MB, and make at least 20GB of partition. So type 20000 MB to make that amount of partition. The new partition will show up as unallocated space. Right-click on the unallocated space and create New Volume and then select next and create.
2.4 Dual Boot Prime OS Android 11
Now that we have our partition created, we can move to the next step of booting in the Prime OS installation. I am doing this process on an Asus laptop that has a Ryzen 5 2500U processor. For my system, the BIOS key is the F2 button. You can check for your BIOS key in the image below.
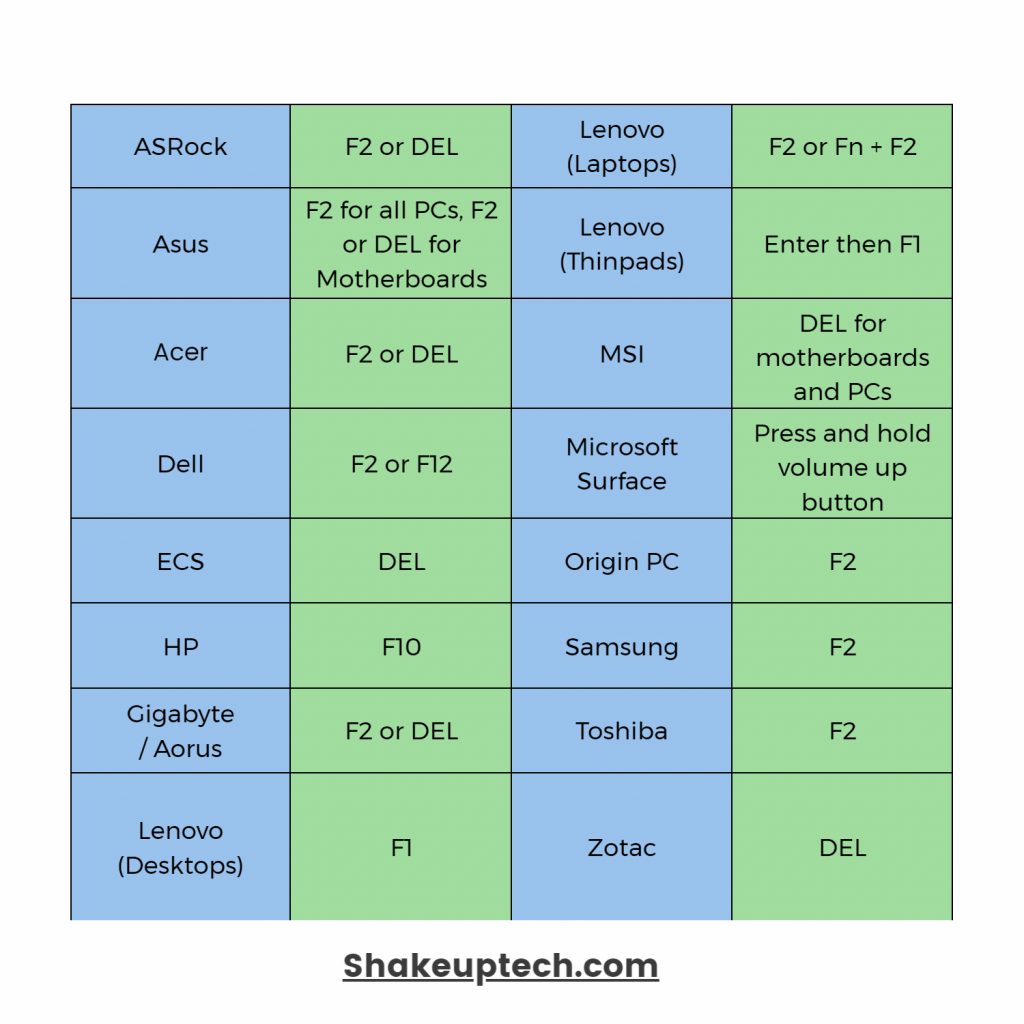
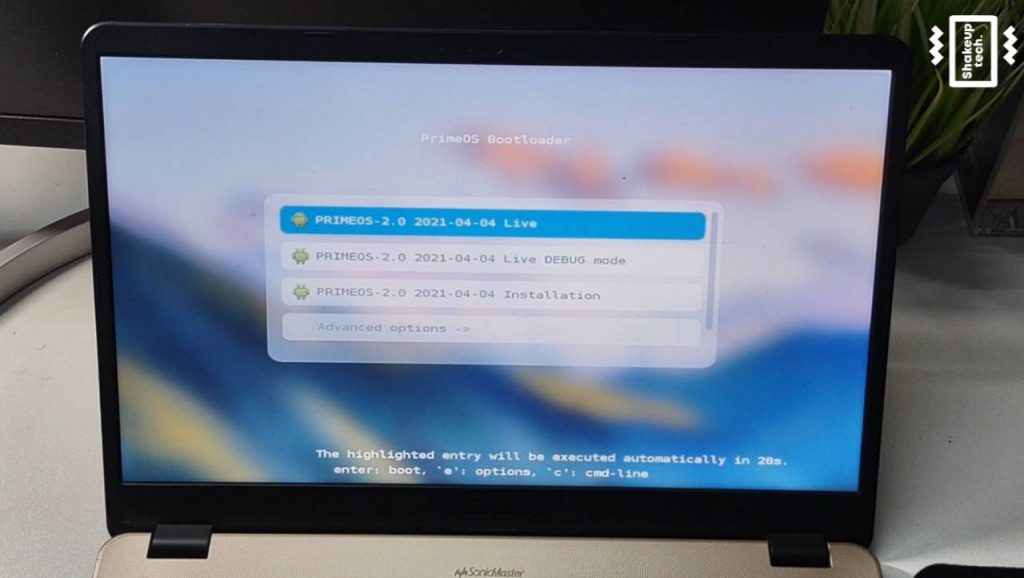
We need to boot into BIOS and select Boot device options. Then we can see our USB listed there and we need to select that. The Prime OS installation screen will now open up. We need to select Prime OS installation to begin the process or you can use the LIVE option to explore the OS before installing. Also check if the OS is compatible with your system.
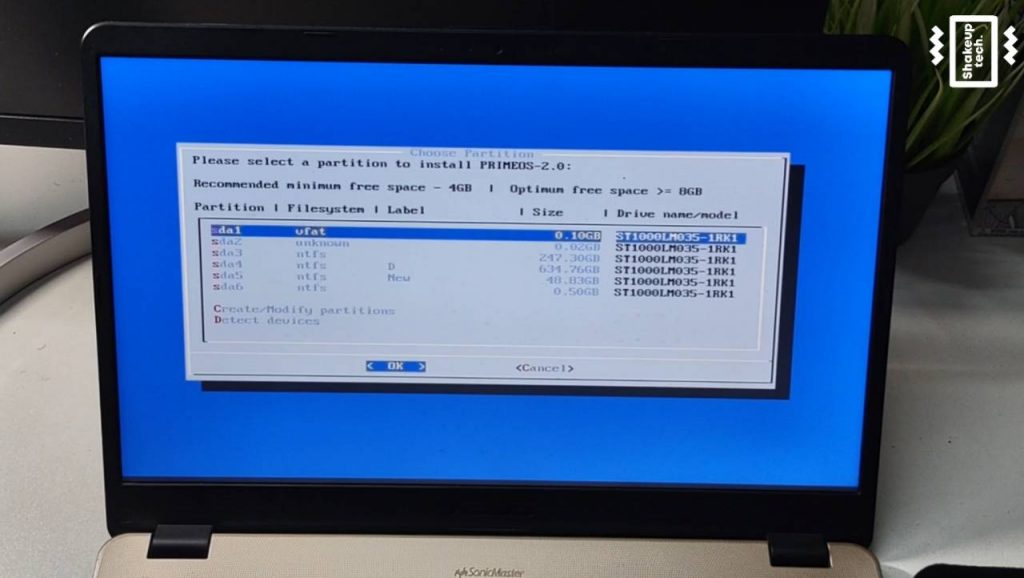
After clicking the installation option we need to select our newly created partition among the list of partitions shown. After that select the EXT4 option to format the partition. Select yes for the EFI Grub option, as this is the option that gives us the Dual Boot menu when restarting the system. The process of formatting the partition will start and then sync with the Prime OS installation files. The process of installation can take some time so do not interrupt the process.
2.5 Run Prime OS 2.0 Android 11 on a PC
After the installation is completed we can see two options. Either run Prime OS or reboot. I will recommend rebooting to check the dual boot Grub menu. We can then see we have the option to boot either Prime OS or Windows from the boot screen. Now select Prime OS and the first boot will begin and can take up some time.
After it boots the set-up will begin and we need to put in our username and time zone. When it’s done we can see the home screen of the Prime OS Android 11. In my case, the first impression was the notification of the launcher not responding. Which was not very welcoming. After that, the experience was not at all as I expected.
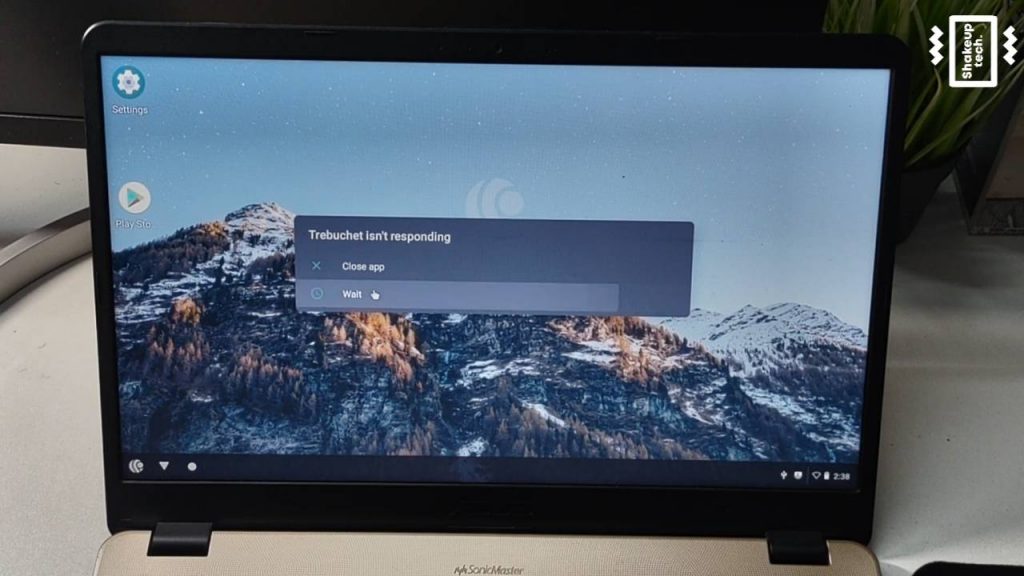
The WiFi was working and I did sign in to my Google account. I tried the Google Play Store and that opened up fine. For some reason, the installation of any Android app was taking way longer than anticipated. Anyways it could be my CPU fault. The interface is very responsive and smooth when it works. We have a tablet version of the Android 11 OS and it looks very intuitive.
2.6 Prime OS Android 11 Experience on PC
I saw random crashes loads of time and it was not a good feeling. I have used the Android 7 version and it was very smooth with zero to no crashes whatsoever. But the fault can be with my AMD Ryzen CPU as well. I will advise doing a live run of the Android OS before installing to get a good overview of how it is gonna perform later. I cannot conclude by saying do not use it because 1st thing it is in BETA and 2nd, the experience with different CPUs can vary drastically. But one thing is for certain is that right now at least for me this is not going to work.
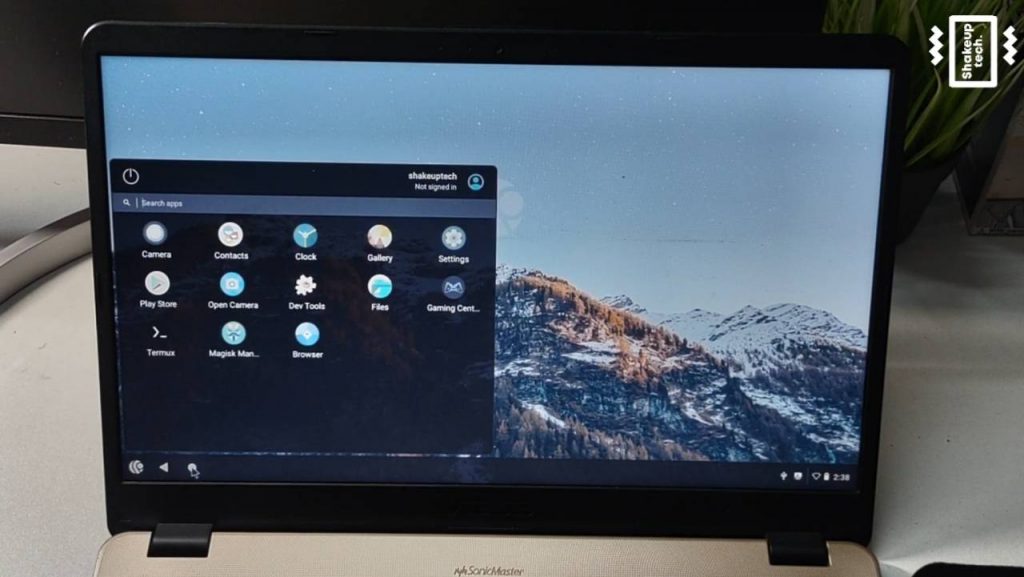
I also made a video tutorial and wanted to screen-record it. The OS is Android 11 had a native screen recording option. But when I tried to screen record, the system froze and then the recording started. I did some random actions and then sopped the recording.
But when I went to view the recording the whole system crashed and I had to force shut down. I tried installing the VLC player from the Google Play Store, but even that could not play the video file. The performance is pretty smooth but the crashes and errors just ruin the whole vibe.
3. Conclusion
So that is how to Install Dual Boot Prime OS. And like I mentioned before run the live version first and then go with the full installation. The issue can be limited to my system and I don’t want to diss the Prime OS for it. You can check the Android 7 version which is quite stable.
PrimeOS is available in two Android versions, Android 7 Nougat and Android 11. The new Android 11 version is still in the BETA stage of development.
Both Android x86 and Prime OS are good and stable Android OS for PC. Android x86 provides a smartphone-like experience on the PC level. While Prime OS is more focused on Gaming with its keyboard mapping support.
Yes, Prime OS comes pre-installed with the Google Play Store and Google Play Services. We can easily sign-in and download Android apps and games.
Currently, Prime OS 0.6.1 is based on Android 7 Nougat and is the more stable version. Prime OS 2.0.1 is based on Android 11 and is still in the BETA stage.
Chrome OS is an official operating system from Google. It is more focused on productivity and general usage. While Prime OS is mainly for Android gaming with its keyboard mapping support.


Thank you for your kind words.
How booting into Prime OS or Windows without flash drive
Saya sudah berhasil install prime OS android 11 .. tetapi untuk wifi tidak bisa konek .. tolong bagaimana caranya bisa konek WiFi nya
How booting into Prime OS or Windows without flash drive ?