Motorola phones have a good amount of custom ROM development. Many of the Moto users unlock the bootloader of their device and flash a custom ROM. Unlocking bootloader changes the Widevine L1 support of Motorola phones to Widevine L3. This in turn disables Full HD support for streaming content on OTT platforms like Netflix and Amazon Prime Video. Now let’s see how to flash stock firmware on any Motorola smartphone and also relock the bootloader.
How To Flash Stock Firmware on Motorola Smartphones & Relock Bootloader
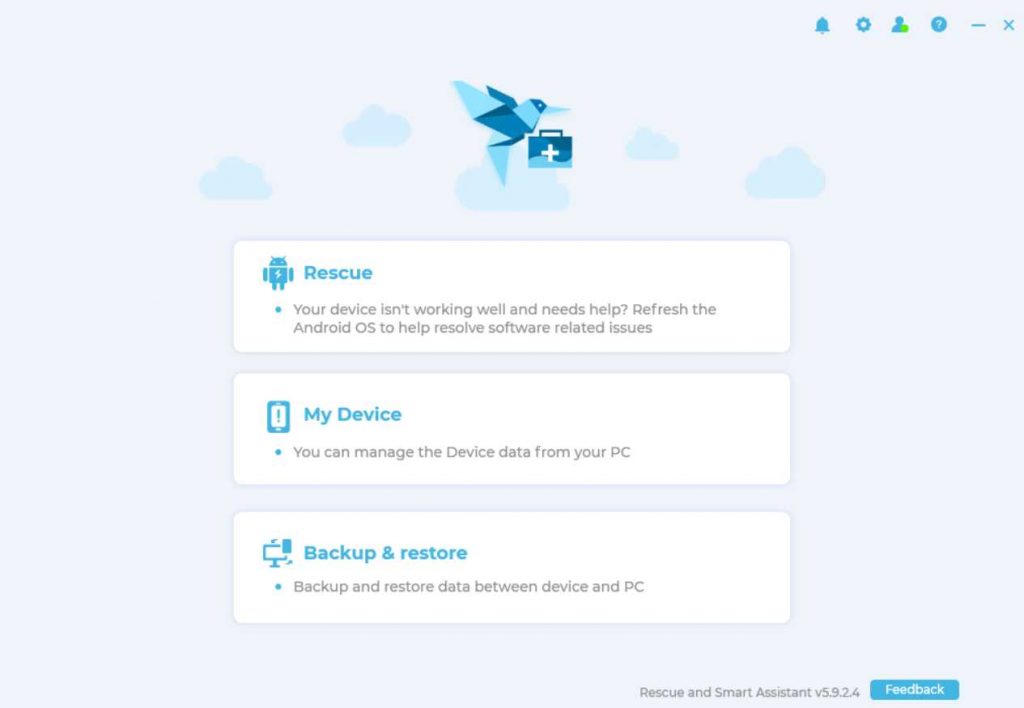
Lenovo and Motorola Rescue and Smart Assistant
So Motorola and Lenovo have this software program for the Windows OS that can update our device to the latest firmware and do lots of other stuff too. But beware this does format our data but there is an option in the RSA (Rescue and Smart Assistant) to backup and restore our data. This tool is basically for rescuing our smartphone if it ever gets in some trouble or we need to revert back to Stock from a Custom ROM. RSA flashes our device with the latest firmware for our smartphone and resets it as it came out of the box.
RSA Download and Install
Lenovo Rescue and Smart Assistant Tool are available on the official Motorola website. We can download the program from here. Once downloaded we need to install the program. It will ask you to log in to the Lenovo account once you open the program. We can sign up using Microsoft or Google if we do not have a Lenovo account. Make sure to check the Remember Me option or else it will prompt us to sign in every time we open the program.
ADB and fast boot drivers To Relock Our Motorola Smartphone Bootloader
Visit this website link and download the 15 second ADB installer. This will help us to control our device from ADB and also in fast boot mode. And to make sure fast boot commands work well, we’ll download the Motorola device drivers from this link. This will reassure us that our phone will be recognizable in the fast boot mode. After we have extracted and installed the ADB files, we’ll see an ADB folder in the C Drive. Open the folder and right-click while pressing the Shift key and we’ll see an open PowerShell or terminal option. We will be using this terminal after we flash the Stock firmware from the RSA program.
Connecting Motorola Smartphone
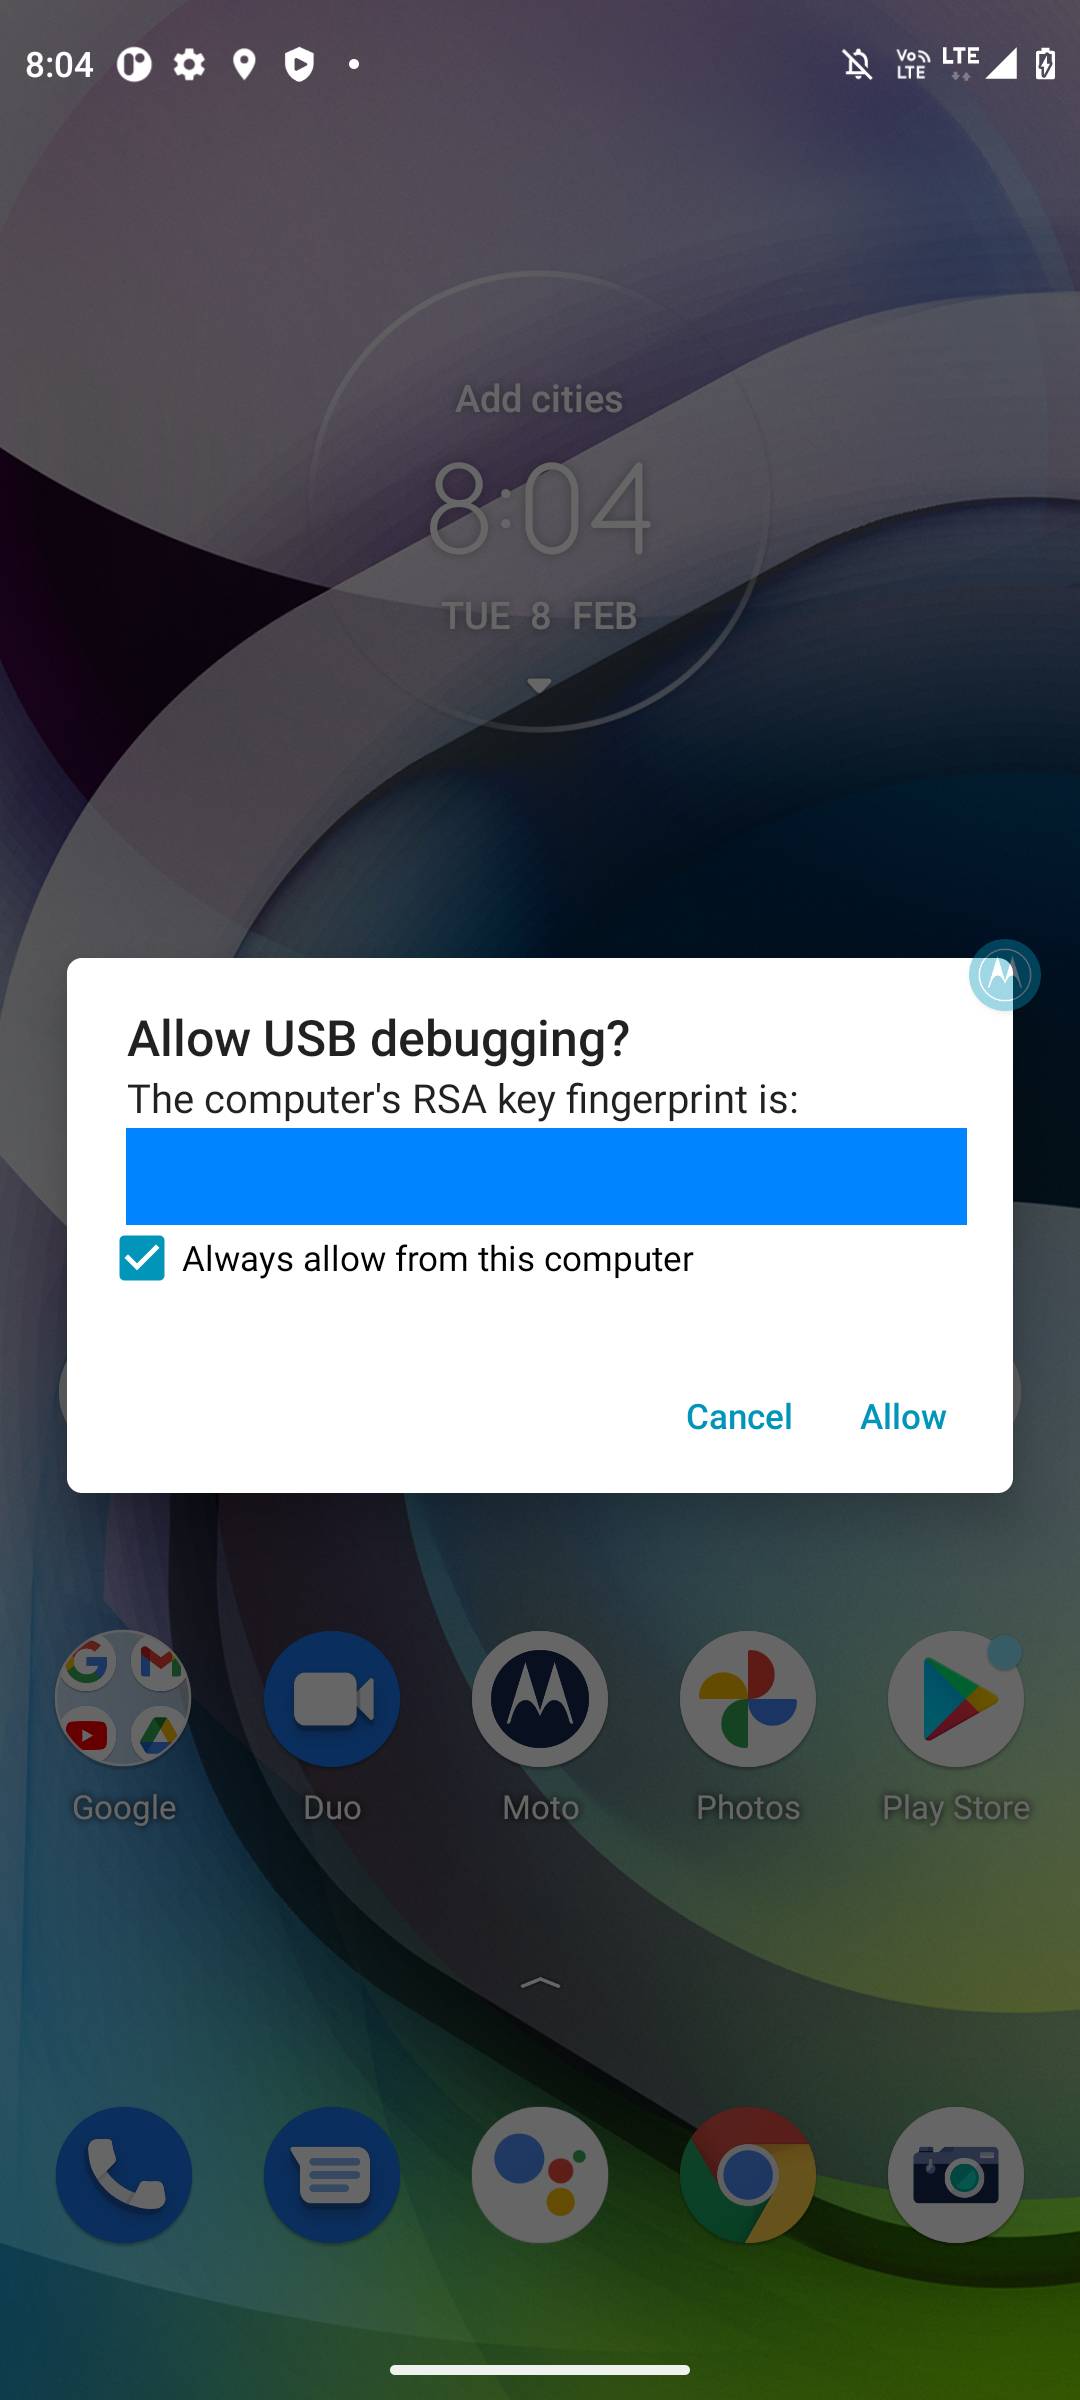
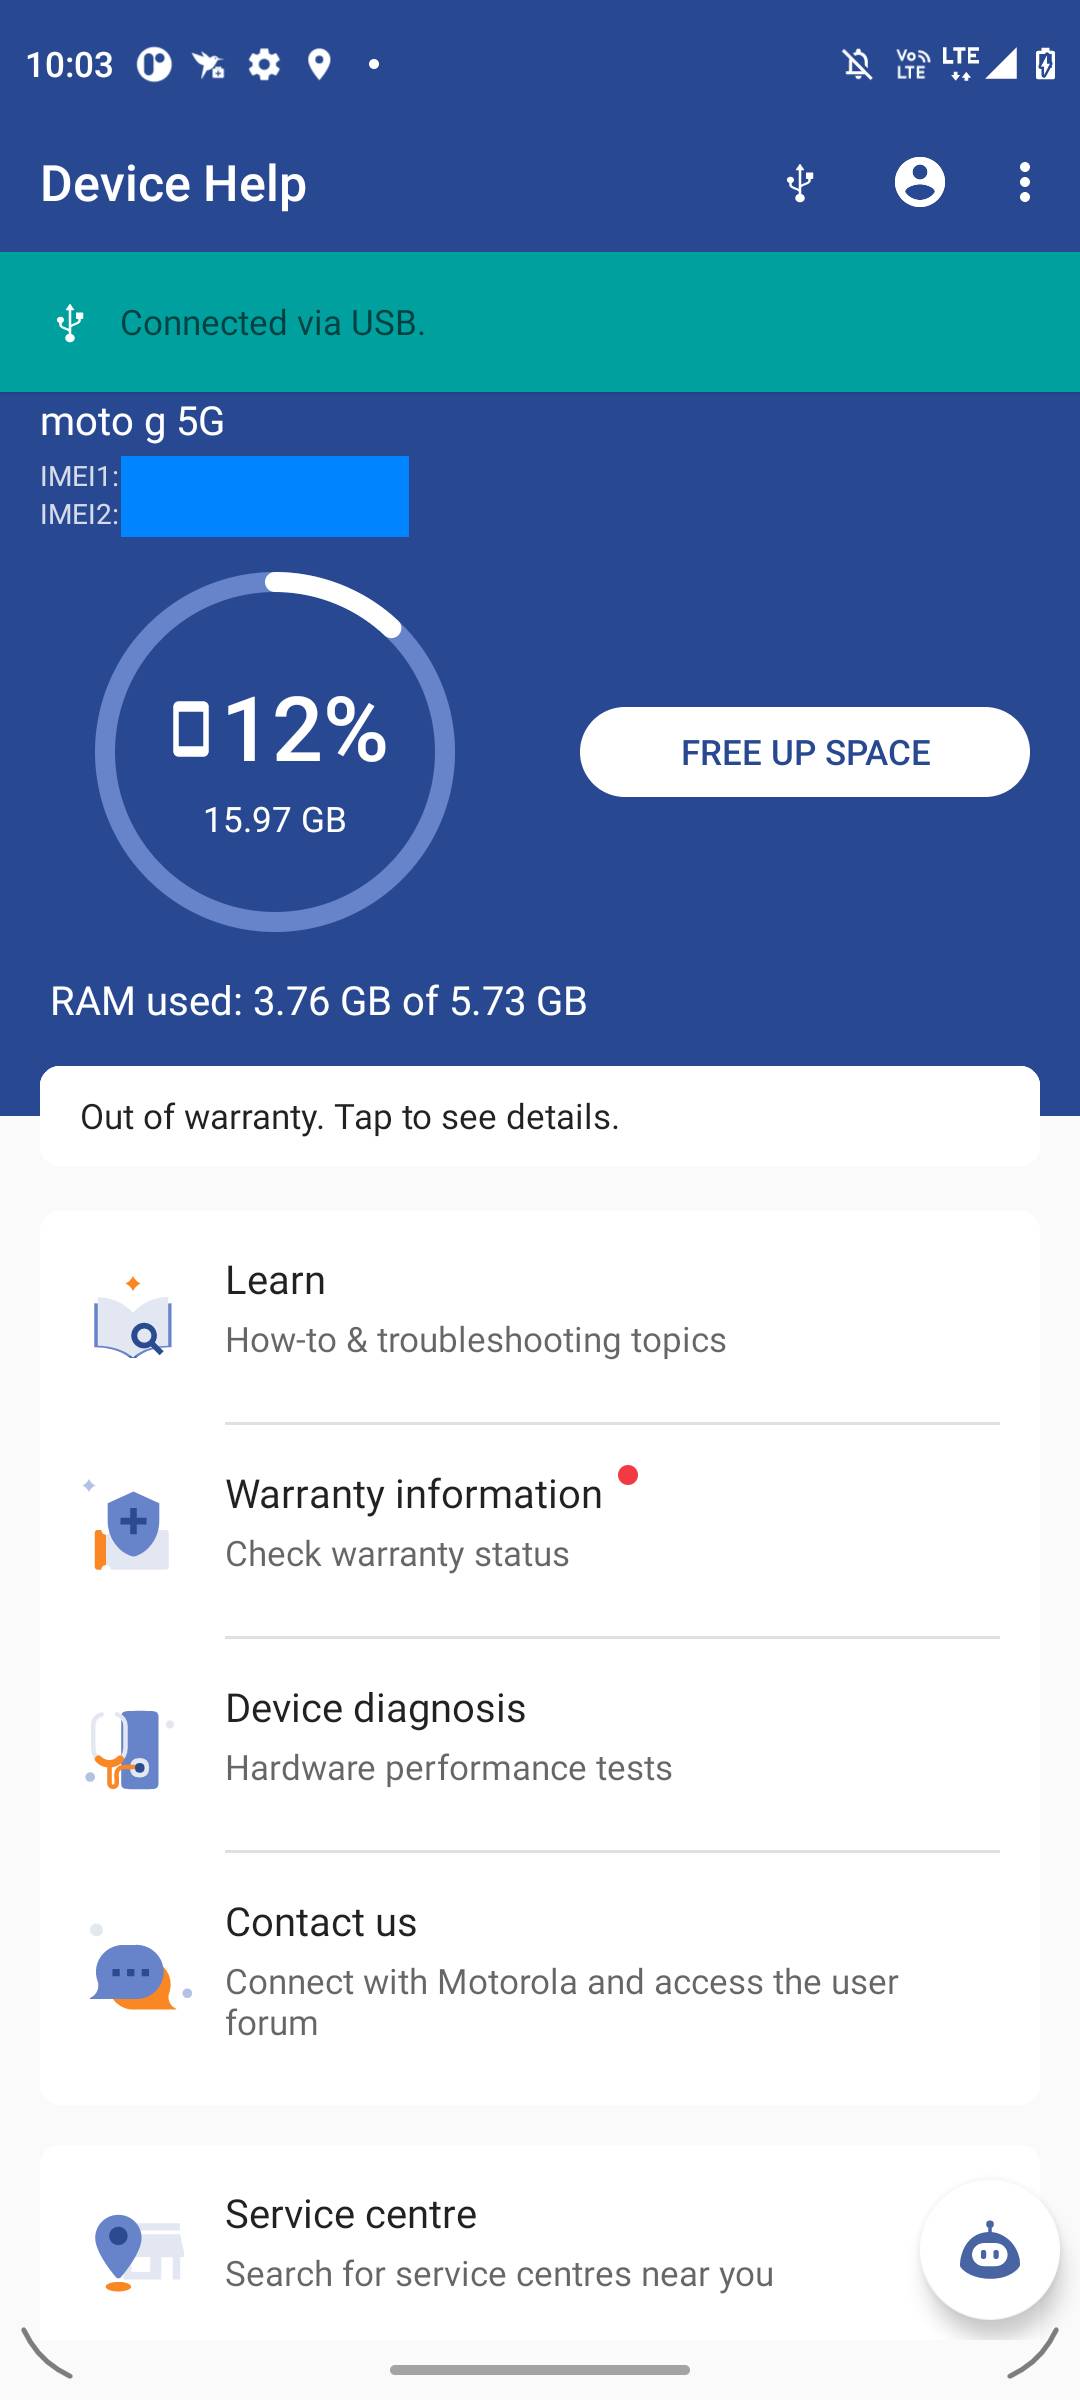
Now we need to connect our Motorola smartphone to the PC for the RSA to detect. On our smartphones, we need to enable the developer settings. To that, we need to go to the About phone section and then tap on the Build number seven times. Now in the developer options, we have to toggle on the OEM Unlocking option or it should be enabled and greyed out by default. We also need to toggle on the USB debugging option. Now connect the device to the PC and you will see a prompt to Allow USB debugging for the PC, tick the remember this device and enable it.
How To Install Stock Firmware on Motorola Smartphones Using RSA
In Rescue and Smart Assistant, you will see lots of options like My device, Toolbox, Support, etc. To flash the stock firmware on our Motorola smartphones we need to click on the My Devices option and it will show your IMEI, Model number, battery, storage info, and other info. We can also see the device screen and we have the option to capture a screenshot.
In the window on the left side, we have multiple options, like apps, photos, videos, contacts, etc. We can view all these files and also import them onto our PC or export files from our PC to the smartphone. So we can basically share files between our phone and PC using the RSA program. The second last and last options are really helpful as they can help us save our device data. Backup and restore allows us to select the contacts, pictures, videos, and apps, and save them on our PC. We can restore this backup later using the same method. The One-Click clone option can create a clone of our device and send all the data including photos, videos, apps, contacts to a new second device that we have to connect to our system.

So before reverting back to stock Android and relocking our bootloader, it will wipe out every data on our phone. We can use these backup and restore features to create a data backup and keep it on our system, as it will give peace of mind while proceeding with the task.
Read How to Unlock Bootloader and Flash Custom ROM on Moto G 5G!
Flashing Our Motorola Smartphone with Stock Firmware
Once we click on the Rescue tab, the RSA will scan our device’s model number and build number to fetch the firmware information from the servers. The great thing about Rescue and Smart Assistant is it does all the fetching of firmware on its own and we do not need to be scared about slashing the wrong firmware file, as it can be disastrous. Once it fetches the latest firmware for our Motorola Device then we can click on the Download button to start the downloading of the firmware file.
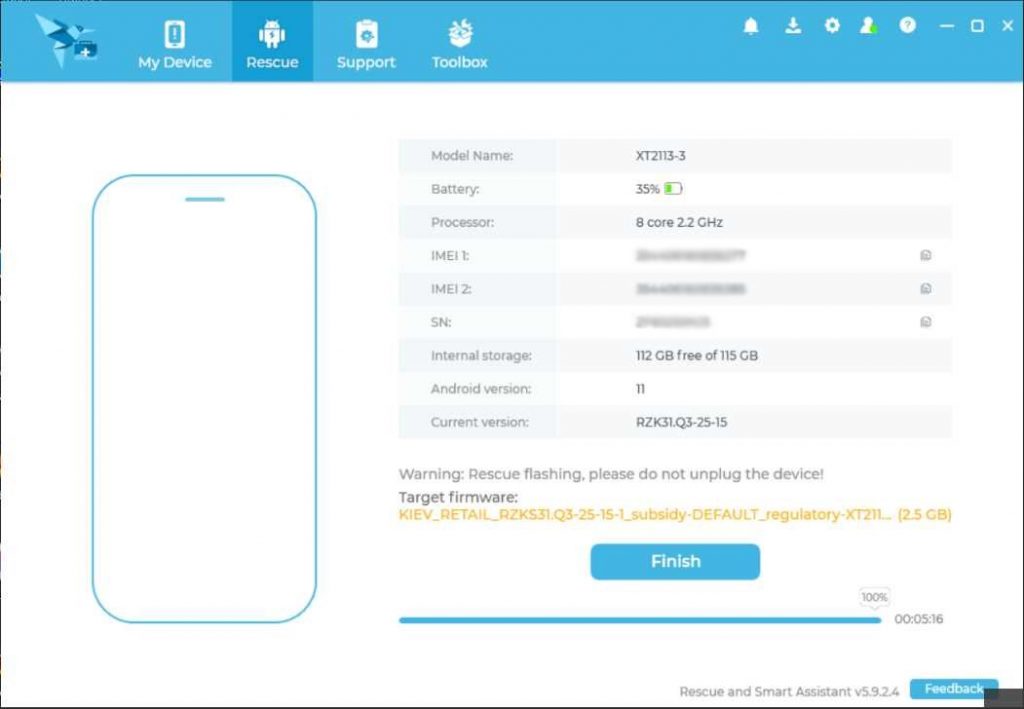
With the firmware file, the RSA also downloads all the ADB and fast boot files for our Motorola device. So it automates the process of flashing without us doing anything as RSA takes care of the device drivers and all the necessary files. Once the firmware is downloaded there will be an option to Rescue our device which will start the flashing process. So click on it and wait for the flashing to complete, it will automatically flash and then delete the user data. After a while, the process will finish and it will say device reboot, as the device will start to restart and there will be a finished sign on the screen.
Relocking Bootloader of Motorola Smartphone
Our Motorola smartphone will restart and we need to set it up and then we will relock the bootloader. Skip through the set-up process and then go to about phone and enable the Developer options. Now we need to enable the USB debugging option and also make sure that OEM Unlocking is toggled on or at least enabled and greyed out. Now that we have done that we can proceed with relocking the bootloader of our Motorola smartphone. We need the ADB terminal we opened in the ADB folder and then run some commands.
Type,
adb devices
We will see the same allow USB debugging prompt on our phone and we need to allow it.
Now type,
adb reboot bootloader
Our phone will reboot into the bootloader mode, and we can now run the fast boot commands. So type,
fastboot devices
To make sure our device is recognizable
Then type,
fastboot oem lock
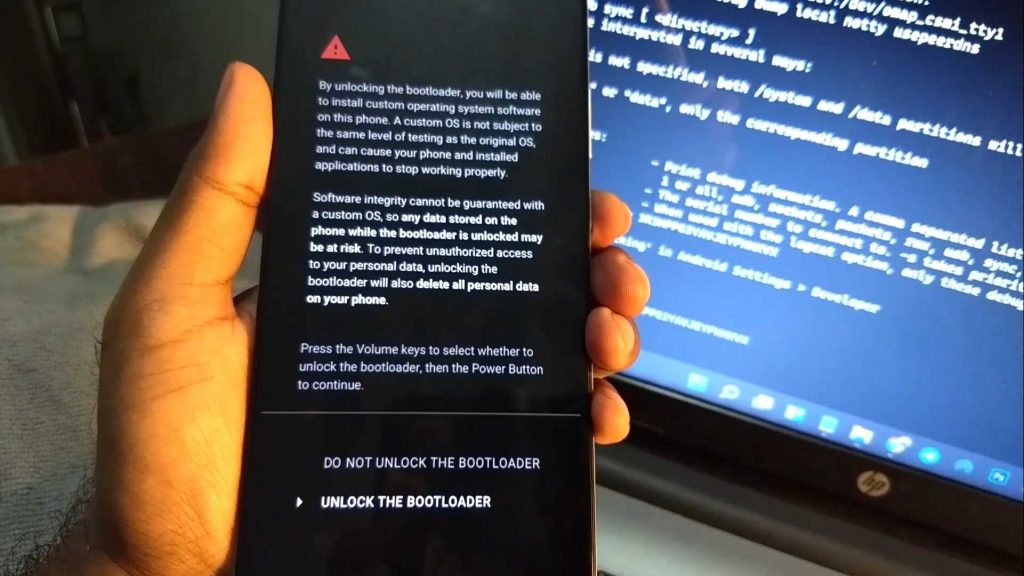
After running this command we will see a prompt on our smartphone. We need to use our volume button to choose between do not lock the bootloader and locking the bootloader. So we will choose the lock the bootloader option and on the terminal, we will see the confirmation. Our device will automatically reboot and we can notice that there’s no bootloader unlock warning anymore. The device has been formatted again and we need to set it up again this time we can take our time while setting it up. After finishing the set up we can see that our device is locked and loaded again. We can check it by downloading the DRM info app from the Google Play store and it will show our Widevine status as L1. So there’s how we can relock our bootloader and flash the stock firmware on our Motorola smartphone.